Showing posts with label mg shenlong. Show all posts

Monday, June 13, 2011

MG Shenlong - WIP 7 - Finished Painting

Old hockey stick and electrical tape.  This is my way.

PGSF hand is in there by accident.

Fangs?  These have got to go.  I cut them off.


Friday, June 10, 2011

MG Shenlong - WIP 6 - Greens

Preface? Unnecessary.

This was fun.  The model is simple enough so that it doesn't feel very daunting.

3 types of green

Had some tone trouble.  Matching parts weren't sprayed exactly the same.  I would need to go back and correct it again later.  Kinda got held up with that otherwise I would have been done sooner.


Simple enough.  Can't believe how much fun I'm having. This is what it's all about!  Watching these things come alive!

Thursday, June 9, 2011

MG Shenlong - WIP 5

Just trying out different back grounds.  I did nothing to the white armour.  Just left it as is as I'm prone to do.  I'm not finicky about my whites unless we're talking about my t-shirts and socks.


Sometimes when you're making Gunpla you gotta make some cinnamon rolls too.  What?  You don't do that?!

Which one of the backgrounds do you like and why? Any opinions? Just curious.

Wednesday, June 8, 2011

MG Shenlong - WIP 3

Going backwards now just to fill in the gaps so bare with me.  After I sprayed the frame again I decided to work from the bottom up as usual.

Regular Krylon black for the feet + chrome silver for the vents and smaller parts.

Lining parts in Testors enamel black.  Cleaned up with a cotton swab dabbed in enamel thinner.  Came out very clean.  I also painted some of the vents here in chrome as well.

Tried to make each step as solid as I could. Well... within reason.

Monday, June 6, 2011

MG Shenlong - WIP 4 - Hands

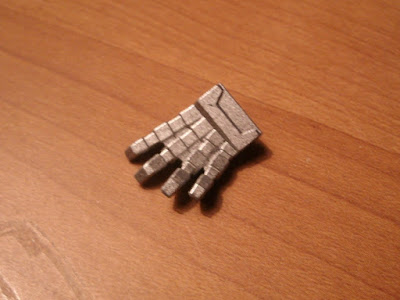
Although I'm basically done there are still a couple of things I still want to do. Refining the hands are one of them.

Hate that "webbing" in between the fingers.  Dragon or not that has got to go.

180 grit sand paper, 0.1 mm micro file and exacto-knife

Saw, shave, saw, shave, shave, saw, saw, shave, sand, sand, shave.

Now I can relax. Sometimes you gotta do these things!

Saturday, June 4, 2011

MG Shenlong - Paints

Not the best picture to show off the paint scheme but...  The Dragon.  That's all I'm going to say.

Here's the run down basically.

Testors Green (Armour), Jade Green (Metallic - armour secondary colour), Gold (trim) - Enamel
Tamiya Chrome Silver, Clear Green (on the skirts - tough to even this out but looks great) Gold flake (shield) - Acrylic

Black base coat. Same grey base coat in there too. Both enamel sprays. Testors is grey and Krylon Fusion is black.

Friday, June 3, 2011

MG Shenlong - Finished!

Skipping ahead because I can't wait!  I have to share this immediately!


I love this kit! I'm telling you... the Dragon Fang has got to be one of the best ideas ever. Love it! More to come!

Tuesday, May 24, 2011

MG Shenlong - WIP 2

Technically this would be WIP 1.  WIP 2 is just me spraying the whole frame again with the same acrylic chrome silver.

Made sure to hit the joints properly... of course almost all of it gets covered up but I do this on principle not for practically.  If there's one thing I've noticed about my building process it's that I consistently build the entire frame first and then attach the armour to it.  I look at them as separate entities so I almost never follow the build process in the manual. I love seeing the frame before I launch into the armour section.  Long time readers will have noticed that with me.  I don't know why I do it that way.  All I know is that I have to do it that way.

What came before.
What comes now.
Recap:  First I sprayed on runner.  Cut, nub work, assemble.  Paint does come onto my fingers as I do this.  Spray again, same colour hitting trouble spots and joints.  Tissue in the cockpit so Wu-Fei doesn't get hit.

Next:  Armour time starting at the bottom and working up.  Also something I always do.  I don't know why.  I'm going to stop questioning it.  It is what it is.

Saturday, May 14, 2011

My Newest MG

The pics say it all.

Sprayed with Tamiya acrylic X11 Chrome Silver on runner just because it was easy to do and can get to some parts that are hidden later. It's good but it could definitely use another coat... which it will get.

I have to admit that I really like this frame. It's simple and it's sturdy. I like the round shield and I also like the fact that the Dragon Arm also has it's own frame. I'm treating it less as a weapon and more as a part of the suit itself. Very enjoyable experience.

He loves the Gunpla boxes.