Showing posts with label frame. Show all posts

Friday, February 11, 2011

PG Strike Freedom - Frame Painting Details

Backtracking a bit as I'm trying to get the files on my computer a bit more organized.  I did take some more detailed pics of the frame earlier and it's about time to show them.  Unfortunately I didn't take proper before and after pics but you can kind of get an idea of what the original frame looks like here and hereThis blog also did something similar to myself with a good comparison of colours.  I did basically the same thing but I didn't learn about that blog until today for the record. I thought of painting the frame this colour on my own.  Just saying.

First off, I didn't paint everything because I thought it was unnecessary.  I left the plated parts as is, along with some of the gold parts. ASM took some great photos and he hasn't done anything to his frame yet so I'll be using him as a point of comparison.  These are his unpainted legs.  I elected to only paint the section below the knees because it was the most blatant offender (to my eyes).  I didn't go "all in" on the frame because I thought about ease of painting and the amount of time it would take.  I balance these considerations to get an acceptable effort/effect ratio.  The lower leg seperates easily below the knee.  I masked the feet and just sprayed it with Tamiya Acrylic X-12 Gold Leaf.

The arms were a little bit special.  I disassembled them, removed the plated parts, re-assembled and then painted as one piece.  I didn't paint the pieces individually.  I painted them as a whole.

Helmet, shoulders and torso were done.  I didn't do the chest vents.  I left that as is.  Yeah I'm burning candles in the background.  Don't you like to put on some incense, burn some candles and have a romantic evening with your Gundams?!  Haha jk I'm burning them up because I was moving out and wanted to use them before I left.

Entire waist/hip area + upper leg joints were done.  You can see I left a bit of the yellow on the knee caps.  Too small to be fussy about + I wanted to leave a bit of the yellow in just to break up the colours and add some separation to the parts.

I didn't bother with the feet.  Too much of pain to disassemble plus there isn't that much of that yellow to warrant me going through the effort.  There's enough plated gold there to balance it out.  Gotta think about the E/E ratio!

Rail guns turned out better than I'd hoped.  You can see a bit of yellow at the muzzle section.  That's where I held the part for painting.  Not being a perfectionist for this.  Just want to get the basic frame gold on principle.  Most of it is going to be covered up so I'm taking some short cuts.

Shiny gold body and flat light grey boots.  I like the contrast!
People have asked me "Why paint the frame?" and I can't really give a good answer.  It's just a compulsion to finish something that is unfinished.  And I believe the stock kit, fully assembled and finished is, indeed actually unfinished.  Yes, most of it will be covered up later but some of it will be exposed between cracks in the armour and I can tell you now, with the current paint scheme, the painted gold frame really paid off.  It's shiny in the places where I wanted it to be so I'm happy I did it... AND it didn't really take that much time or effort to do.

If you're the type of person that cares about that stuff I'd highly recommended doing it the way I outlined here.  It's low cost, low risk, low effort but high return.  I DO recommended using acrylics because you don't want to risk enamels or lacquers eating away the plastic (if you're not priming).  Trust me.

Monday, January 11, 2010

Inner frame - To paint or not to paint

That is the question. And here is the letter from one of my readers.

Hello there, my name is Min. I've been following your blog for some time now and I am finally starting my first painted piece. I have one question that I wanted to ask an experienced modeler like you which I couldn't find in any tutorials or videos.I don't know if I'm supposed to paint the inner frame of a MG model or not. I have a Strike Noir Gundam and seems that in this model a lot of the inner frame shows through all the armor pieces.I'm afraid that if I paint the inner frame, it will reduce mobility and make the paint chip off whenever I move it. Am I supposed to paint the inner frame or am I not?

Thank you in advance. I love your work!

***

Well Min, thank you for your letter and I hope you don't mind that I've decided to answer it publicly because I think that we could all benefit from opening up the dialogue to everyone out there and get some other opinions and perhaps help each other in the process.

First... your concerns are valid but on a case by case basis. Paint chipping will happen unless you top coat adequately. Paint, not to mention top coat on top of it, will reduce mobility in the frame.
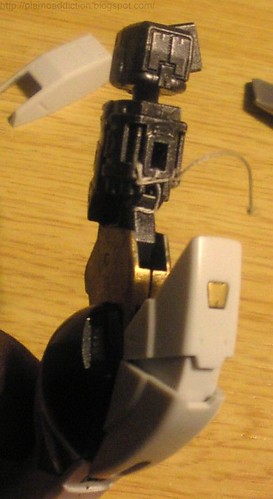
Speaking personally, I've painted the inner frame of a model more than a couple times and have occasionally experienced some problems. This was either caused from the enamel paint I was using melting/weakening the plastic or from the paint itself causing parts to stick together and upon trying to move those parts breakage would occur. A combination of both of these things happened with my Impulse thus causing me to actually SEW the parts together to keep some stability in articulation not to mention the sliding armour parts.


Of course painting the inner frame also has the not insubstantial benefit of increased bad assedness.


...which often is reward unto itself.

But lets be honest... You're going to spend all that time painting the frame and it's just going to be covered up with armour anyways. What's the point really? Especially considering that the joints and moving paints may stick together or break in the process.

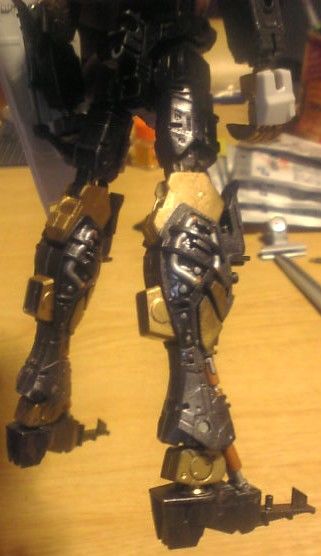
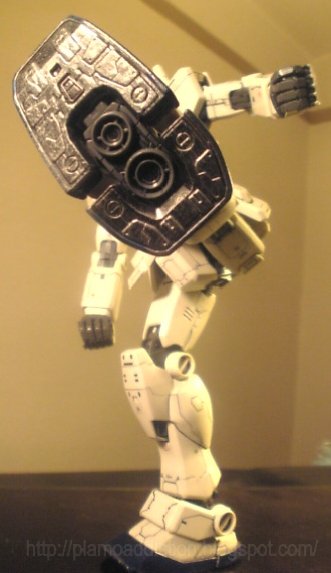
I decided to take a different approach with my Sinanju and just paint the joints and other exposed areas. This was less time consuming and the result was satisfactory.


So on a whole I'd say that painting the frame might not be worthwhile unless you are the perfectionist/completionist type or are planning on leaving some of the armour off OR you are planning on using clear armour parts.

If you insist on painting the frame for whatever reason I'd suggest you just paint the exposed parts (usually the joints and ankle pistons) but be wary of:

1.The type of paint you're using. Lacquer is the most corrosive, then enamel, the acrylic. (If I recall correctly.)

2.How complicated the joint mechanism is .

3.How much of it you're actually going to paint.

4.If the painting will interfere with joint movement or parts sticking together.

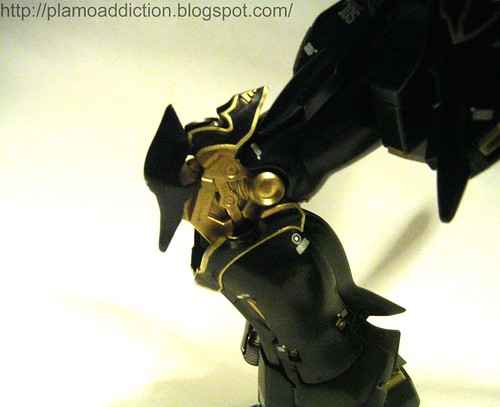
It worked out with the knee of my Sinanju but not the elbow or the wing joints. The knee joint was sturdy and thick enough to deal with the enamel paint I was using (no primer) but the elbow and wing joints weakened significantly.

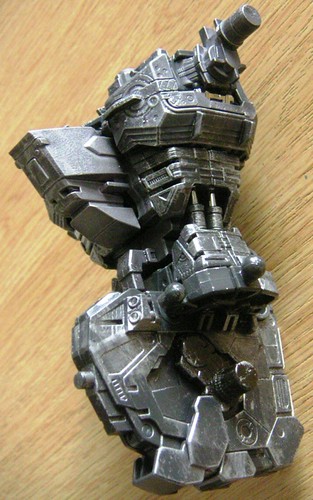
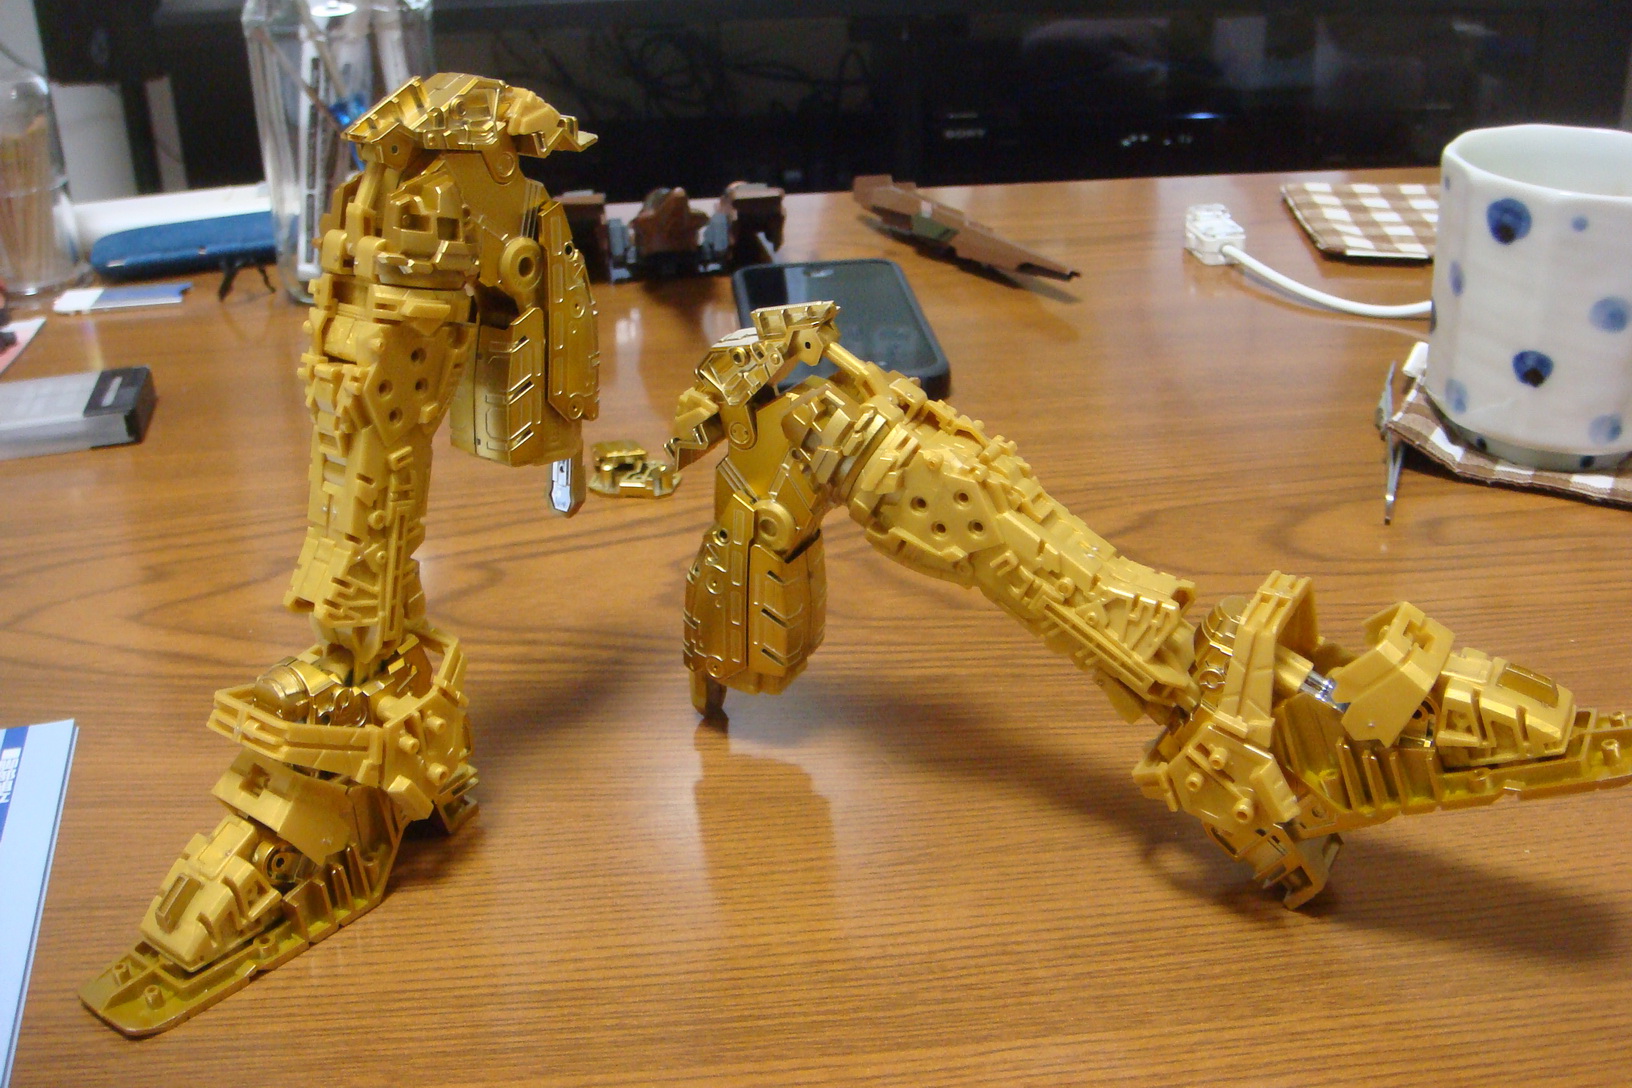
I did a light frame paint job on my PG Red Frame/Strike Frame project to give it more of a metallic look but that was a 'conceptual' project and I painted the frame on principle. The PG frame was easily sturdy enough to stand up to the relatively light paint job I applied to it. There were no problems as all.

So I've had both good and bad experiences with frame painting from full paint jobs to partial. While it's troublesome at times I can say concretely that I've never been disappointed with the end result and have no regrets about doing it at any time. In my opinion frame painting can be that one detail that separates a good model from a great one

So I hope that answers your question! Thanks for taking the time to write and for your kind compliments.

What do the rest of you think about frame painting? Worth while? Not? Do you do it? Personally I just can't leave the frame completely alone if I'm planning on finishing a MG. The knee/elbow joints and ankle pistons at the very least.

Tuesday, June 23, 2009

Strike Vermillion & Astray Strike Frame

A couple more shots of Strike Vermillion and Astray Strike Frame. Both models are incomplete. I still have a lot of work to do on both of them but for now this project is on hold and I'm moving back to my MG G04.

Tonzo mentioned in the last post that the katana on either side of the mech looks good as seen with the Astray Orange Frame and I'm starting to think that he's right on two points. One; in response to what I said about being a traditionalist and having two blades on one side of the warrior... He said that's true in the case of a Katana and Wakizashi but not necessarily a Katana and ANOTHER Katana. And I must agree. Two; there is the balance issue. The Katana/Wakizashi combination wouldn't look like how the Astray wears the double blades. It isn't that cumbersome and bulky (spoken with experience as I've done it myself on numerous occasions - don't ask.). I think it might be better if the Astray has a blade on either side... I mean it's not like robots are left or right handed right? And balance is more of an issue for machines... So... I can make the change and still maintain my principles haha

Without question the Astray is a bulky mech especially in comparison to conventional Seed designs like the Strike, Impulse, Freedom and so on. TheAastray looks like a football player next to a swimmer. But hey! We're all built differently right?! Just because he's bigger doesn't mean that he's not as effective or uglier! It's all perspective/opinion! I know a lot of guys out there who can't stand Seed's "anorexic" designs and like the Astray style a lot more.

That said... I like both of them. From the waist up I like the Astray but from the waist down I like the Strike... hey wait second... I wonder would it would look like if...

OK guys take a look at these pics, cause you won't be seeing these guys for while. In the meantime I'm going to try some 'experiments'.


Had to leave 'Afro Samurai Gundam Pilot Double B' in the pics for scale. These are some tall war machines!

Saturday, June 20, 2009

PG Astray: Strike Frame

From all of these runners, he emerged. Seriously. This is all of them. I didn't throw any away.


Construction operations completed.
*but I still have a long way to go before I can say this project is done*

Wednesday, June 10, 2009

PG Astray: Strike Frame - Sub armour sections complete

I painted the figure just to show the scale. Yeah I know Lowe isn't black but I am! Where are all the black Gundam pilots?! Anyways I had no flesh tone paint so I just went with brown.


Tuesday, June 2, 2009

Dry Brushing for Metallic Effect

So a couple people have been asking about how I achieved the weathered metal look on my PG Astray. Well it's actually quite a simple technique. I initially tested this technique on the soles of my RX-78-2 OWY Gundam.

rx78-2-95

Seeing the results, I decided I'd try this technique out again on the Astray (I can't call it the Red Frame anymore...)

Here are my tools.

Pretty simple. Usually I use a napkin (I keep the extra fast food napkins I get when I get take out) dap a bit of paint on it and rub the toothbrush bristles in it. The bristles on the toothbrush are normal softness but have gotten harder because of the paint that’s dried on it. Generally I use a silver enamel paint for this because it gives the type of contrast and light reflection that I'm looking for however I might move on to 'Dull Aluminum' the next time I try this. Just to switch things up and try something new.

I 'scratch' some marks onto the part and that's it! This technique works really well on edges and parts that have extra detail (as in some raised or sunken sections). The bristles catch on those sections and leave the paint there adding a lot of depth to the part.

Depending on the type of look you're going for, you can use a different kind of brush. For example of you're going for a slight wear and tear look or a more metallic but slightly dull finish to the part (ideal for people who like to do internal frame work) a soft brush would be recommended. The most important thing is to take the excess paint off the brush before applying otherwise it won't be much different than painting the part normally. Get rid of that excess paint! The less you have on the bristles the finer it will look in the end. After all... it's called DRY brushing for a reason! haha Also a brush with bristles in a fan shape is best for this. Recommended but totally optional.

The theme I'm going for on this Astray (you'll understand why when you read the story I made for it) demands this type of hard bristle work. I wanted the frame to look well used. Not like it'd been through hell and back or damaged but just that it had seen it's fair share of usage.


PICT0436

In this case I didn't even use a napkin and just used the lid of paint jar and applied the markings lightly (but still leaving thicker lines than usual). I didn't do this for any special reason. I was just lazy and thought that since most of the frame is going to be covered up that I don’t need to do a superior job on the frame; just an adequate one. And the results are adequate for me.

Astray Strike Frame Update:

Sub armour has been painted, touched up and attached. I don't have much left to do here. I'll be starting the armour application process before the end of the week. Trying to eliminate all the red from this project has been quite the undertaking but my experience with my EE Sinanju has definitely been coming into play with this process. Again. What is it with me and red? Just can't stand seeing it on my mechs sometimes.

Saturday, May 30, 2009

PG Astray: Strike Frame


PICT0437
Originally uploaded by Busterbeam

I mentioned before that I'd be spending a bit more time on the frame than usual on principle and I'm think I'm finaly done with the basic frame.

I wanted to give it a used, metallic look so I did a bit of silver dry brushing all over the frame and painted the tubes/wires. I could have done a better job but it's all going to be covered up by armour anyways so I didn't put in my best effort. However I do believe that some of my efforts will pay off once the armour is applied because a bit of the frame is going to peek out in places so... We'll just have to wait and see if I'm right or not.

As usual there are more images at my flickr.

Friday, May 29, 2009

PG Red Frame / PG Strike frame comparison - Part 2

This post was long over due but here's the 2nd half focusing on the PG Astray with the PG Strike frame.

Starting with the cockpit. The only change here is a pretty minor one. The cockpit cover latch is different. Really it's almost insignificant. I dont know why they made it like that.

The neck connection is a bit different.

Most of the changes can be seen in this shot. Chest frame cover, cockpit hatch cover and the torso/shoulder joint are all different from the Strike.

This is the last part. The elbow armour connection panels are different. Outside of the parts I mentioned here, there are no extra parts that are necessary for the Astray frame.

As you know all know now, I've used the PG Astray Red frame for my Strike Vermillion and I will be using the Strike frame for my PG Astray. Here they are side by side before armour application. I really like the Strikes lower legs and feet. The Astray feet seem really bulky to me now.

That's all for now. I'm a bit behind on posts so I suspect that I'll be blogging a bit more within the next couple of days. I have a free weekend with no plans so that means I can finally concentrate on the things that matter. *looks at his Red Frame box*

Saturday, May 9, 2009

PG Red Frame / PG Strike - Frame comparisons

I've talked about this a few times in my blog but here is the visual proof of just how similar these kits are. I've taken the Red Frame and put the necesary Strike parts on it to make it into the Strike Frame. The differences were minimal to say the least. I havent changed any of the colours here. The dark grey parts are necessary to make the Strike frame.

The major part is the torso. Because of the way it's constructed you must use the cockpit housing of the Strike. Technically the difference between the two is slight but significant. I've highlighted the differences here in red. Thanks to Dalong for the scans.
Red Frame


Strike frame


Because the cockpit housing is built as one piece you have to use the entire unit, even tough 90% of the construction is the same. The re-occuring theme with this is that the PG Red Frame actually uses less parts than the Strike. At least concerning the frame.

After swapping the parts it looks like this. The neck and shoulder joints are slightly different. The torso's outer frame is significantly different than the Red Frame.


Couple of slight differences concerning the arms. Just the elbow/forearm armour mounting and the shield attachment unit.


I did repaint the foot of the Strike black because the red just clashed too much with the colour of the frame. I like it better like this. Actually, the Red Frame comes with almost all the parts necessary to make a complete Strike frame but there were just counted as extra/useless parts on the runners in the Red Frame manual. For example the Red Frame comes with the Strikes "Combat Knives" but they were considered 'useless' parts for the Red Frame.

Conclusion - Not a lot of differences in the frames at all. Bandai certainly saved a lot of money in this area. Frame wise, the Red Frame uses about 90-95% of the Strike frame but the Strike uses 85-90% of the Red Frame. Consistent with SEED chronology, the Strike frame clearly came first in the development process and Red Frame is just a slightly slimmed down version of it with a couple modifications here and there.

It's funny that despite the percieved bulkyness of the Red Frame with armour, it actually has lighter and thinner frame than the Strike. However the Strike's armour is considerably thinner and less bulky than the Red Frame. Perhaps this is to better accomodate the various Striker packs it uses.

More frame comparisons to come but next time we'll look at making a Red Frame from a Strike frame.

Wednesday, April 8, 2009

PG Gold Frame

From this month's Dengeki Hobby


Thank you for your patronage. Please come again.

Tuesday, April 7, 2009

PG Green Frame

Perfect Grade MBF-P04 Gundam Astray Green Frame. Re-colour of the red frame, naturally, from this month's Dengeki Hobby. Images courtesy of myself. They did a pretty good job on the custom rifle don't you think?


Thank you for looking at this blog. Here is some candy.