Showing posts with label 1/60. Show all posts

Thursday, January 27, 2011

PG Strike Freedom - 5th Stage Complete

1st stage was frame assembly.  2nd stage was frame painting.  3rd stage was wing assembly.  4th stage was basic painting and priming.  5th stage was armour application.

6th stage will be dis-assembly and painting.  7th stage will be decal/line work and I think that should be it.

This is my Perfect Grade Strike Freedom fully equipped.  There is nothing left in the box except for the stickers and decals.


I did do some custom painting on the head.  Couldn't just leave it as is.  Metallic grey, flat aluminum, gunmetal and the same gold I used on the frame.


I'm going to pack everything up except for the core suit itself, so that he looks just like this. He will be the Gundam that stays with me until the end and will be the first to enter into the next era of "Plamo Addiction".

A very enjoyable build experience! I was hoping for a bit more but it didn't disappoint me. Unfortunately... my wing fix couldn't support the full weight of the wings with the dragoons attached. It'll stay in place and not fall but it's not secure. Oh well. May have to do that ring fix after all. Even still the suit by itself is quite nice even if some of the proportions still throw me off a bit. I'm going to wait to try some different poses for it until I get back to Canada.  Last Gundam built in Japan.  Thank you PG Strike Freedom!

Wednesday, January 26, 2011

PG Strike Freedom - Progress thus far: 5 - Armour Application


Because I've cut almost everything off the sprues already, putting the armour on has been a relatively painless process.

I did spray the blue and red panels on runner with primer, thus the grey tone. Left hip rail gun is in grey and right (it's left) is in white. Just ran out of primer and that's what I had left so... I actually like how this is starting to look with just the primer colours! Of course I'm not going to keep it like that but it's starting to shape up! I finished the wings as in I primed the Dragoons and painted the frame armour black and have the whole system assembled... It's really touchy! Hard to keep them locked into place. Just a nudge and they'll spring open! Blah.

Anyway I'm aiming to have this guy COMPLETELY assembled before I launch out on Tuesday.  And yes he's going IN the suitcase and I'm taking him with me, along with my airbrush and paints (I don't want to wait for him to be shipped back with the others.) I should be able to do it. I might be pushing things (everything) down to the wire but I think I can have it all done in time.

Tuesday, June 23, 2009

Strike Vermillion & Astray Strike Frame

A couple more shots of Strike Vermillion and Astray Strike Frame. Both models are incomplete. I still have a lot of work to do on both of them but for now this project is on hold and I'm moving back to my MG G04.

Tonzo mentioned in the last post that the katana on either side of the mech looks good as seen with the Astray Orange Frame and I'm starting to think that he's right on two points. One; in response to what I said about being a traditionalist and having two blades on one side of the warrior... He said that's true in the case of a Katana and Wakizashi but not necessarily a Katana and ANOTHER Katana. And I must agree. Two; there is the balance issue. The Katana/Wakizashi combination wouldn't look like how the Astray wears the double blades. It isn't that cumbersome and bulky (spoken with experience as I've done it myself on numerous occasions - don't ask.). I think it might be better if the Astray has a blade on either side... I mean it's not like robots are left or right handed right? And balance is more of an issue for machines... So... I can make the change and still maintain my principles haha

Without question the Astray is a bulky mech especially in comparison to conventional Seed designs like the Strike, Impulse, Freedom and so on. TheAastray looks like a football player next to a swimmer. But hey! We're all built differently right?! Just because he's bigger doesn't mean that he's not as effective or uglier! It's all perspective/opinion! I know a lot of guys out there who can't stand Seed's "anorexic" designs and like the Astray style a lot more.

That said... I like both of them. From the waist up I like the Astray but from the waist down I like the Strike... hey wait second... I wonder would it would look like if...

OK guys take a look at these pics, cause you won't be seeing these guys for while. In the meantime I'm going to try some 'experiments'.


Had to leave 'Afro Samurai Gundam Pilot Double B' in the pics for scale. These are some tall war machines!

Saturday, June 20, 2009

PG Astray: Strike Frame

From all of these runners, he emerged. Seriously. This is all of them. I didn't throw any away.


Construction operations completed.
*but I still have a long way to go before I can say this project is done*

Wednesday, June 10, 2009

PG Astray: Strike Frame - Sub armour sections complete

I painted the figure just to show the scale. Yeah I know Lowe isn't black but I am! Where are all the black Gundam pilots?! Anyways I had no flesh tone paint so I just went with brown.


Saturday, May 30, 2009

PG Astray: Strike Frame


PICT0437
Originally uploaded by Busterbeam

I mentioned before that I'd be spending a bit more time on the frame than usual on principle and I'm think I'm finaly done with the basic frame.

I wanted to give it a used, metallic look so I did a bit of silver dry brushing all over the frame and painted the tubes/wires. I could have done a better job but it's all going to be covered up by armour anyways so I didn't put in my best effort. However I do believe that some of my efforts will pay off once the armour is applied because a bit of the frame is going to peek out in places so... We'll just have to wait and see if I'm right or not.

As usual there are more images at my flickr.

Friday, May 29, 2009

PG Red Frame / PG Strike frame comparison - Part 2

This post was long over due but here's the 2nd half focusing on the PG Astray with the PG Strike frame.

Starting with the cockpit. The only change here is a pretty minor one. The cockpit cover latch is different. Really it's almost insignificant. I dont know why they made it like that.

The neck connection is a bit different.

Most of the changes can be seen in this shot. Chest frame cover, cockpit hatch cover and the torso/shoulder joint are all different from the Strike.

This is the last part. The elbow armour connection panels are different. Outside of the parts I mentioned here, there are no extra parts that are necessary for the Astray frame.

As you know all know now, I've used the PG Astray Red frame for my Strike Vermillion and I will be using the Strike frame for my PG Astray. Here they are side by side before armour application. I really like the Strikes lower legs and feet. The Astray feet seem really bulky to me now.

That's all for now. I'm a bit behind on posts so I suspect that I'll be blogging a bit more within the next couple of days. I have a free weekend with no plans so that means I can finally concentrate on the things that matter. *looks at his Red Frame box*

Monday, May 25, 2009

More Strike Vermillion + Where are they now? Current poses for my models

Thought it'd be nice if I put up some pics of the current poses that my 'boys' are in. I have a lot of models but these days I only keep the ones that I've painted/lined out. You can see the gallery for all of these models on the side bar.
Also there are couple of extra pics of the Strike Vermillion. More of that to come in the future but for now... I'm going to try and put that aside until my Astray is done. I think I can officially say that my distraction is now over. I'll put all of these pics up on my flickr in case there are any problems with the links.

Monday, May 11, 2009

PG Red Frame Comic - Part 1/3

Those who purchased the PG Red Frame got this comic included with the model itself. I'm not sure if this is out on the net yet but if it isn't, it is now. I'll post them in installments.


All images are also at my flickr (don't trust this html crap)

Saturday, May 9, 2009

PG Red Frame / PG Strike - Frame comparisons

I've talked about this a few times in my blog but here is the visual proof of just how similar these kits are. I've taken the Red Frame and put the necesary Strike parts on it to make it into the Strike Frame. The differences were minimal to say the least. I havent changed any of the colours here. The dark grey parts are necessary to make the Strike frame.

The major part is the torso. Because of the way it's constructed you must use the cockpit housing of the Strike. Technically the difference between the two is slight but significant. I've highlighted the differences here in red. Thanks to Dalong for the scans.
Red Frame


Strike frame


Because the cockpit housing is built as one piece you have to use the entire unit, even tough 90% of the construction is the same. The re-occuring theme with this is that the PG Red Frame actually uses less parts than the Strike. At least concerning the frame.

After swapping the parts it looks like this. The neck and shoulder joints are slightly different. The torso's outer frame is significantly different than the Red Frame.


Couple of slight differences concerning the arms. Just the elbow/forearm armour mounting and the shield attachment unit.


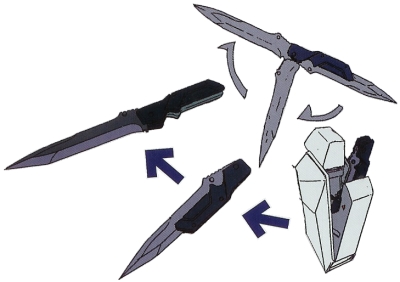
I did repaint the foot of the Strike black because the red just clashed too much with the colour of the frame. I like it better like this. Actually, the Red Frame comes with almost all the parts necessary to make a complete Strike frame but there were just counted as extra/useless parts on the runners in the Red Frame manual. For example the Red Frame comes with the Strikes "Combat Knives" but they were considered 'useless' parts for the Red Frame.

Conclusion - Not a lot of differences in the frames at all. Bandai certainly saved a lot of money in this area. Frame wise, the Red Frame uses about 90-95% of the Strike frame but the Strike uses 85-90% of the Red Frame. Consistent with SEED chronology, the Strike frame clearly came first in the development process and Red Frame is just a slightly slimmed down version of it with a couple modifications here and there.

It's funny that despite the percieved bulkyness of the Red Frame with armour, it actually has lighter and thinner frame than the Strike. However the Strike's armour is considerably thinner and less bulky than the Red Frame. Perhaps this is to better accomodate the various Striker packs it uses.

More frame comparisons to come but next time we'll look at making a Red Frame from a Strike frame.

Wednesday, April 29, 2009

Hobby Magazine Poster's - PG Red Frame

Well I've been spending a lot of time scanning some of the posters from my hobby magazines and figured I'd share some of them. For this session I'll start with the PG Red Frame posters.


Monday, April 27, 2009

Sinanju Bazooka 2 and PG Red Frame PG Strike frame comparison

Well first off let me apologize. They were sold out. I got the VERY last one at my local shop and since these things are apparently quite rare now, I can't bring myself to sell the extra one I have. Maybe someday. We'll see. A lot of people asked and I would say first some first serve but it just doesn't seem fair somehow. Especially considering I only have the one extra.
I'll keep my eyes open though. If I see anymore I will certainly grab some and sell the extra's but I do want to keep one for my collection. The double gattling guns for the Unicorn Gundam are all but gone now. I don't know where or how you could get one of those these days.
I was totally clueless about the demand for these things and the scarcity. My apologies again. I even went to the post office and figured out how much it would cost to send just the bazooka to any country, speed, price etc. Had it all set up then went to buy some of these things and there was only one left. wtf. 申し訳ございませんでした.m_ _m
***
Moving on the next order of business is the PG Red Frame / PG Strike frame comparison.
I didn't realize just how similar they are. I mean I know a lot of the runners say 2004 on them, indicating that it was copied from the Strike mold but still. It is ultra similar when you look at it on the frame level. Parts of the 'sub frame' (or the frame of the frame) are different, like around the torso and back pack but... yeah I didn't realize that I was buying the same model! It's like doing the 1/100 Blue Frame 2ndL and the 1/100 Red Frame again. Practically the same thing minus some of the armour parts and weapons. Blah.
It's not an entirely bad thing though. Because I wanted to see the similarities between the models I stripped the Strike down and found out that I had it assembled wrong all this time! For years! I lost a couple degrees of articulation in the torso (the part that connects to the waist pistons had been put in backwards.)
Oh well. The end result will look quite different regardless of how similar the frames are. And really that was expected. That's not new information. Even from the story we all know that the MBF Prototype suits are based off of the GAT series of MS. I kind of like the idea actually because it's consistent with the story. It also gives me some ideas for my own story about this suit I'm building now but more on that later.

Sorry again about the bazooka's guys. But like I said in the Storm Dynames post... I was just kicking around the idea.

Tuesday, April 21, 2009

PG Red Frame - Dengeki Hobby 5 scans + Analysis

It wouldn't be right if I didn't finish off the set so here it is. Red Frame P-02. All the work done on the previous versions posted here were also done on this one so lets take a look at some of the modifications.

First the main shot.


The first thing most people are going to notice is the clear green on the legs and the helmet. Also great decal application on the left shoulder. Hard to get that looking good with the edge there.


Great decal job on the outer right leg. V-Fin has been sharpened. Extra detailing on the inside of the vents on the back of the shoulders.


Anyone who's assembled this kit knows that there there are two types of red parts (not including polycaps). Care was taken to unify the colour scheme (including the grey parts). There isn't as much contrast, but that also means there isn't as much distraction. I think it works. I haven't gotten into the sword assembly yet so it's hard to comment but it looks like the blade of the Tiger Pierce is a bit darker than the Gerbera Straight. I saw something like this in Hobby Japan as well but that was more of a custom job. It also looks like the hamon is different on each blade as well. Not sure if that's a custom job or if it came like that but I like it. I'll be investigating this in further detail as I near the end of the build process. I intend to spend extra time and effort on the swords (as I did with my 1/100)


Clear green on the clear parts creates a great effect. Especially with the decal and lining under it. Looks like silver paint on the helmet visors, lined then covered with a clear green painted on the clear part. It works in my opinion. Plastic removed from the torso is a minor mod but it's good. I think the deeper etching of the panel line there created a larger effect though. Lining on the inside of the armour? Hm... don't know if I'm going to go that far this time.

I'm not done with these Astray's yet friends! More to come!