Showing posts with label pgsf. Show all posts

Monday, September 5, 2011

Gauntlet - Epilogue 1

I will be posting the same message on my blog and at GAF as well just so that everyone is on the same page.

***

Time for the text wall.
An overdue post but a necessary one.  I put off writing it until I had the time to do so.  My life became a lot busier on the last day of August with new job orientation and starting work the very next day on Sept.1.  Couple that with plans for the long weekend and you have me out of commission for a while.
I want to thank all of you for your patience.  I know I haven’t been much of a leader for this as I don’t post nearly as much as some others do but I have to admit that this GB has been a thoroughly enjoyable experience even though I left everything for the last minute and severely under estimated the amount of time it would take.
I tried a lot of new techniques on this build.  Namely all the masking work using tape and masking solution (which worked surprisingly well).  This was also the first time that I tried using a gradient paint scheme and also doing some mods with pla-plate to reshape and essentially shorten a few select pieces.
I enjoyed tackling such a huge project and I will be the first to admit that I’m quite pleased with the end result… while at the same time admitting that there is still a lot of work left to be done on this to get it to my own personal standard of excellence in gunpla! Haha.  Still though I count this as completed as the essential parts are done.  It’s definitely battle ready.
However I must admit, if I am to be strict to the rules, I failed this test.  I didn't complete everything.  Some touch ups need to be done, I didn't do enough decals, and finally as complete assembly approached I decided to repaint some sections and change the scheme.  So I have to say... to be honest with myself and to take responsibility as leader, I'm not sure if my Gundam should be in the same ranks as the others.  But since this is my show I'm giving myself a PASS because of one thing alone.  The feeling of PURE satisfaction I felt when it was totally assembled and ready to sortie!  This is why I make models!  That feeling!  Pride?  Maybe.  But that is something that all of us as modellers earn and can own!  I'll will own that.  There's nothing wrong with taking pride in your work!  *okay need to relax. getting too excited*
There’s so much to say so I should probably just break it up into sections of what I’d like to address:
1.       The GB itself and how it started.
2.       The participants and what they’ve made
3.       The concept of “Theta +” / Design notes – Original concept / “The Gauntlet”
4.       Connection with Strike and Red Frame
5.       Technical issues of the build process and the kit itself
6.       Final comments
I will respond to each of these things in time.  Call me verbose but you don’t have to read it.  I, on the other hand, feel compelled to write about it since this blog is a chronicle of my experiences with this hobby.  If I don’t mention it here it will never be mentioned at all.  Let it rest in the digital archives.
I know that over time enthusiasm for projects can diminish quite quickly.  I’m sure a lot of us are eager to jump into our new projects.  I know lupes is already hard at work on the PG Wing and Gaigun is working on any number of kits simultaneously… it’s hard to know what he’s going to focus his attention on next!  ASM will probably be concentrating on his new son.  We certainly did miss his presence in this GB but seriously… priorities.
Anyway this whole GB started in early May with me coming home after a night of drinking and looking on the internet at lupes PG Strike Freedom.  I remembered talking to ASM and Gaigun about ours a couple of months earlier when we’d met in January and it got me to thinking about the Sinanju GB that we did during the “Evil Cow” days.  So I sent a message to all of them + Sonar at GAF asking what they thought and low and behold here we are now.  Sonar brought a tremendous amount of talent and resources to table.  Not to mention the forum itself!  A key player in all of these so major props to you brother!
Now for those of you who may be wondering what this whole Apocalypse thing is, it started last year when myself, ASM, GaiGun and Gundam Guy all went to see the 1/1 Gundam together in Shizuoka.  I can’t remember who coined the phrase (GaiGun I think) but it stuck.  That said GG has never done a GB with us but lupes has so he becomes the fourth in that situation I guess.  I liken it to Voltron when Lance had to step out of being pilot for the Red Lion and Sven came in.  At least I think that’s how it went! haha
Anyway, ASM commented on how I threw down the gauntlet to all of them and somehow we started joking about the Gauntlet of the Apocalypse and there you have it.  Humble beginnings… but I’m so extremely proud of what it’s become, with the banners and the videos and the support and so many others jumping in and building along with us.  Your names will never be forgotten except for… what’s his name again?  You know… that guy.  That did the thing? J
I thought that having a deadline would be important because if it was left open ended who knows when we’d finish.  Motivation can be lost, people can get side tracked.  Life happens.  It happened to some of us during the process of this GB and some had to bow out because of it.  A mixture of happy and sad news... My issues weren’t familial but more concerned with my career.  Still though I managed to push through it and make the time to get it done.  Because of the deadline and when I actually committed myself to working on the PGSF steadily… I was basically forced to streamline my build process.  I became a lot more efficient and by the end of it, doing a full Perfect Grade kit with paint job seems like something I can manage relatively well now.  This was my first time to ever try and complete such a task.  And I’m proud of that and the results so I’m glad that this GB gave me that experience and consequent skill upgrade.  The lesson I learned from that was; “Intimidating tasks can be overcome with steady progress.”
Anyway, even though this GB is officially over, I’d like to leave this topic open for future modellers who wish to try their hand at the PGSF or to any of the participants who completed it but may eventually feel the need to go back and do some touch ups later.  Just because the deadline has passed doesn’t mean that we have to stop learning from each other or helping others who come in late.  So now I’d like to openly invite ANYONE who has ever finished a PGSF or is working on one to post their work in the topic at GAF so we can all help each other and see what type of creativity is out there.  I’d love to see some more custom schemes.  If this topic is any indication I’m sure there are still some great ones out there waiting to be discovered.  Or created.
I’ll just leave it there for now… I’m a completionist so I do intend on mentioning all the things above in due course but I know how intimidating a giant wall of text can be so… like I’m building a model it will be done in incremental steps until it’s all finished.
Thanks again everyone.  None of this would have been possible without you.  You are all key players in this and I thank you all for your time, support, dedication and enthusiasm!
Finished but we move ever onward!
Theta is the 8th letter of Greek alphabet.

Thursday, September 1, 2011

Theta +

That's what I'm calling it.  And I think it is the most insane Gundam I have ever made.


Thursday, August 25, 2011

Late August - Moving hard on the PGSF

Time's running out but I think I can really do this provided my commitment stays as it's been recently.

But this is kind of the best part! I can see it now! And I want to see it ALL. This is when it gets kind of crazy for me. The big pushes, working through the night. Not because of deadlines but because of excitement. It's one of the things I love about this hobby. All that patience. All that time. Never really knowing what it's going to look like in the end when you cut that first piece from the gate! What am I making? And somehow it comes together in all of it's complexity. And creativity.

Anyways to cut it all short... I'm ****ing stoked about this thing now!


He will be a welcome addition to the family!

Saturday, August 20, 2011

Just Talking - Mid-late Aug 2011 - PGSF

This blog needs an update but I'm so busy working on stuff that I don't have time to update really. But I'll tell you this... 3 painted suits in 6 months is kind of a record for me. It's nice getting into a pattern while learning new stuff along the way.  My biggest issue right now is finding what type of thinner works with what brand of paint.

To be honest with you... I'm thinning a lot of this with water and naptha based lighter fuel.  I can get it in bulk and it's cheap. Relatively. I mean compared to the brand name thinners.  If you got your chemistry right you can save a lot of money.  I have to run a series of paint tests with 4 different solvents before I can start spraying.  Sometimes the chemistry actually works out and I can get a decent... atomization?

Here's where I am now.


Sunday, August 7, 2011

This is the Gauntlet.


3 more weeks to go?  Gotta push this.  Still working out the scheme.  This one is going to be crazy folks.  Just a warning.

Sunday, July 31, 2011

The Countdown Begins!

What an awesome video by Kjasi!  Great job man!


Whoo! Getting really excited for this!

Monday, May 16, 2011

PGSF - Wing Fix - Ver. Busterbeam

Don't think I ever did post a follow up to this problem so here it is now that the GB has officially started.
The pics kind of explain everything. If you aren't aware of the breakage/weight problems, check this out.

Ver. Sephiroth

1mm drilling as usual.

+ cement and epoxy putty

Drilling


Ended up using 4 for strength

Then puttied

Then shaved and sanded.  In hindsight I should have left a bit more on for strength but I wanted to make sure that it fit properly.

Works!

Actually I should say that it worked. It would later come loose and it disconnected. It didn't break again... but it is possible for it to slide out and it does sag a bit. It will stay in place but structurally it's not very sound.

I will probably revisit this again as I'd like to fix all the problems with the wings but a lot of it is beyond me. The dragoons snapping open at the slightest touch plus the fully extended wings not really being able to support their own weight... what to do there?

Someone made a sarcastic comment here about how all problems with the model are the fault of the modeler. I disagree. Sometimes things are just designed badly. I think the PGSF wings are ingenious but are actually a little too smart for their own good.

Some of the locking mechanisms featured on the PG00 would have been really useful here. No wonder the price for the PGSF has dropped so much!

Saturday, May 14, 2011

What's coming...

You might have heard already.

More to come.  A lot more to come.  But for now I got this.


September 1. 2011.

Update:  If you have an unfinished PG Strike Freedom or even if you're thinking of getting one... you may want to think about this.

Friday, February 11, 2011

PG Strike Freedom - Frame Painting Details

Backtracking a bit as I'm trying to get the files on my computer a bit more organized.  I did take some more detailed pics of the frame earlier and it's about time to show them.  Unfortunately I didn't take proper before and after pics but you can kind of get an idea of what the original frame looks like here and hereThis blog also did something similar to myself with a good comparison of colours.  I did basically the same thing but I didn't learn about that blog until today for the record. I thought of painting the frame this colour on my own.  Just saying.

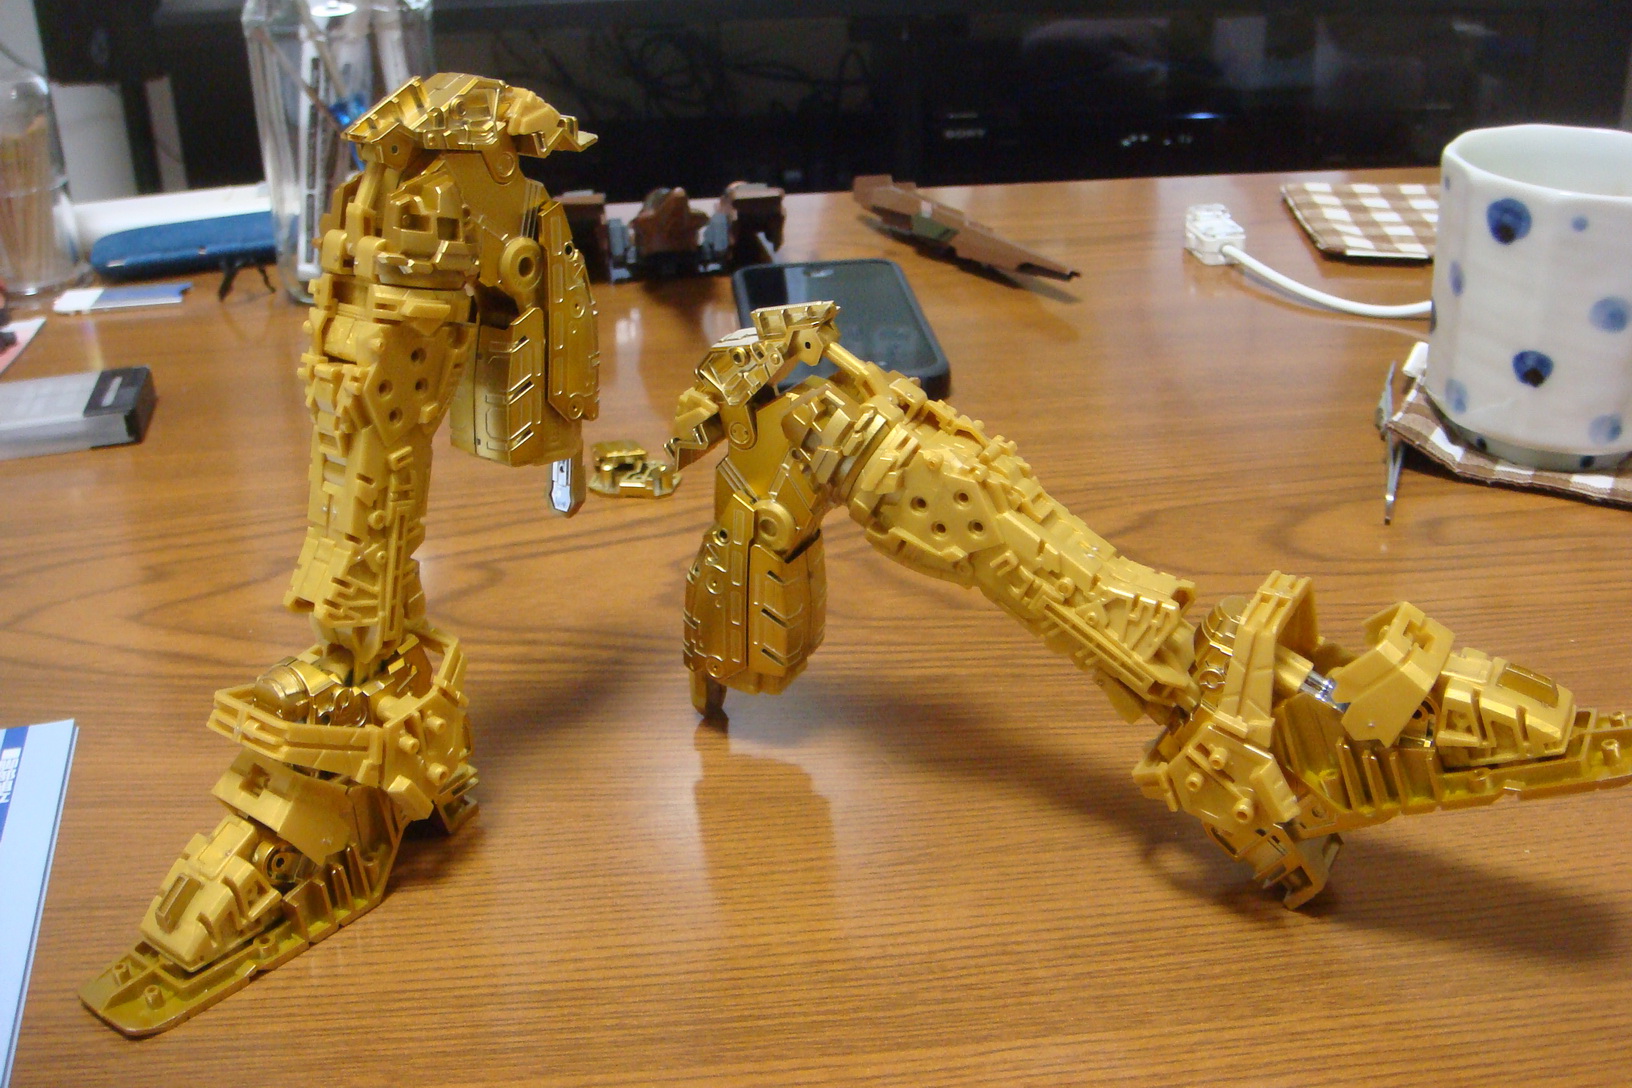
First off, I didn't paint everything because I thought it was unnecessary.  I left the plated parts as is, along with some of the gold parts. ASM took some great photos and he hasn't done anything to his frame yet so I'll be using him as a point of comparison.  These are his unpainted legs.  I elected to only paint the section below the knees because it was the most blatant offender (to my eyes).  I didn't go "all in" on the frame because I thought about ease of painting and the amount of time it would take.  I balance these considerations to get an acceptable effort/effect ratio.  The lower leg seperates easily below the knee.  I masked the feet and just sprayed it with Tamiya Acrylic X-12 Gold Leaf.

The arms were a little bit special.  I disassembled them, removed the plated parts, re-assembled and then painted as one piece.  I didn't paint the pieces individually.  I painted them as a whole.

Helmet, shoulders and torso were done.  I didn't do the chest vents.  I left that as is.  Yeah I'm burning candles in the background.  Don't you like to put on some incense, burn some candles and have a romantic evening with your Gundams?!  Haha jk I'm burning them up because I was moving out and wanted to use them before I left.

Entire waist/hip area + upper leg joints were done.  You can see I left a bit of the yellow on the knee caps.  Too small to be fussy about + I wanted to leave a bit of the yellow in just to break up the colours and add some separation to the parts.

I didn't bother with the feet.  Too much of pain to disassemble plus there isn't that much of that yellow to warrant me going through the effort.  There's enough plated gold there to balance it out.  Gotta think about the E/E ratio!

Rail guns turned out better than I'd hoped.  You can see a bit of yellow at the muzzle section.  That's where I held the part for painting.  Not being a perfectionist for this.  Just want to get the basic frame gold on principle.  Most of it is going to be covered up so I'm taking some short cuts.

Shiny gold body and flat light grey boots.  I like the contrast!
People have asked me "Why paint the frame?" and I can't really give a good answer.  It's just a compulsion to finish something that is unfinished.  And I believe the stock kit, fully assembled and finished is, indeed actually unfinished.  Yes, most of it will be covered up later but some of it will be exposed between cracks in the armour and I can tell you now, with the current paint scheme, the painted gold frame really paid off.  It's shiny in the places where I wanted it to be so I'm happy I did it... AND it didn't really take that much time or effort to do.

If you're the type of person that cares about that stuff I'd highly recommended doing it the way I outlined here.  It's low cost, low risk, low effort but high return.  I DO recommended using acrylics because you don't want to risk enamels or lacquers eating away the plastic (if you're not priming).  Trust me.

Thursday, January 27, 2011

PG Strike Freedom - 5th Stage Complete

1st stage was frame assembly.  2nd stage was frame painting.  3rd stage was wing assembly.  4th stage was basic painting and priming.  5th stage was armour application.

6th stage will be dis-assembly and painting.  7th stage will be decal/line work and I think that should be it.

This is my Perfect Grade Strike Freedom fully equipped.  There is nothing left in the box except for the stickers and decals.


I did do some custom painting on the head.  Couldn't just leave it as is.  Metallic grey, flat aluminum, gunmetal and the same gold I used on the frame.


I'm going to pack everything up except for the core suit itself, so that he looks just like this. He will be the Gundam that stays with me until the end and will be the first to enter into the next era of "Plamo Addiction".

A very enjoyable build experience! I was hoping for a bit more but it didn't disappoint me. Unfortunately... my wing fix couldn't support the full weight of the wings with the dragoons attached. It'll stay in place and not fall but it's not secure. Oh well. May have to do that ring fix after all. Even still the suit by itself is quite nice even if some of the proportions still throw me off a bit. I'm going to wait to try some different poses for it until I get back to Canada.  Last Gundam built in Japan.  Thank you PG Strike Freedom!

Wednesday, January 26, 2011

PG Strike Freedom - Progress thus far: 5 - Armour Application


Because I've cut almost everything off the sprues already, putting the armour on has been a relatively painless process.

I did spray the blue and red panels on runner with primer, thus the grey tone. Left hip rail gun is in grey and right (it's left) is in white. Just ran out of primer and that's what I had left so... I actually like how this is starting to look with just the primer colours! Of course I'm not going to keep it like that but it's starting to shape up! I finished the wings as in I primed the Dragoons and painted the frame armour black and have the whole system assembled... It's really touchy! Hard to keep them locked into place. Just a nudge and they'll spring open! Blah.

Anyway I'm aiming to have this guy COMPLETELY assembled before I launch out on Tuesday.  And yes he's going IN the suitcase and I'm taking him with me, along with my airbrush and paints (I don't want to wait for him to be shipped back with the others.) I should be able to do it. I might be pushing things (everything) down to the wire but I think I can have it all done in time.