Showing posts with label hlj. Show all posts

Monday, September 13, 2010

HLJ VF-27 - Supplemental - "The Zone"

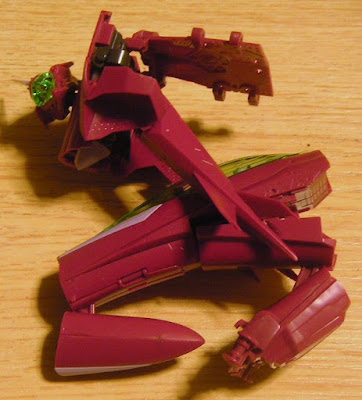
Not an official part of the WIP. I'm at the decal stage now and it's tough, time consuming work. Especially the way that I'm doing it. I feel like I'm going to have to put myself into the "zone" again and really just power through it.

It's weird. I felt myself getting there the other night but I had to shut it down early and go to bed (it was near 4am at the time). I'm not sure if you any of you have felt that before. That point when you're modeling and you just want to keep pushing and do as much as you can for as long as you can, regardless or time or plans for the next day. I felt that before when I was working on my Impulse.  (After re-reading that post it's funny to think about how little as changed.)

I'm going to have to go back to that 'place' again.  Force myself in because you know... I'm just frustrated.  Not with anything in particular.  Just myself.  My summer vacation is nearly over and I'm thinking of what I've done but what keeps coming back is what I haven't done.  Don't concentrate on the negatives just make the changes now.  No regrets.  Just movement.  Forward movement.  Gotta make it happen.

First I'll get the chores and stuff out of the way, so I can enter with a somewhat clear conscience.  I work best when the sun has completely disappeared so...  I'll be going into the zone at around 9pm and going hard until the jobs done.  Or I lose my mind.  Or should I say lose 'more' of my mind.

Time for the big push!  Here we go!!!

Wednesday, September 8, 2010

HLJ VF-27 - WIP 8 - Rifle

First and only appearance of under-gates. ALL gates should be like this as far as I'm concerned.
Not that many parts.  More complicated than regular rifles but definitely manageable.
I like how they put in the nozzle of the energy emitter.  You'll never see it later but its the little things you know.  I also like how the scope can pop up.  The handle can fold back ever so slightly.  Kinda wonder why they even bothered to add that.
Open
Closed
I've long since painted and detailed this but pics of the parts I painted will be covered in a separate post.

Tuesday, August 31, 2010

HLJ VF-27 - WIP 7 - Wings

This is final step of the construction of the vehicle.  There are still some extras left to do but this is basically the end of the assembly process.

The parts in question.

This is worth noting.  I almost ruined the project here. I'm still not exactly sure how I got myself out of this.  I put the rod in first to test the fit and it got jammed a bit too far in.  I couldn't put in the wing piece because the rod was in the way.  It would not budge and as you can see here the connecting joint is thin and fragile.  It could break easily with a bit of forcing and that's exactly what I was doing.  I managed to push it out somehow... but try to avoid making this same mistake if you can.  Because once that rod is in... it's REALLY tough to get it out again.  You can kind of see my sweat on this piece from the amount of effort I was putting into it.

The details... the details that no will will ever see.  It's almost a shame.

Wing frame attached.  The main wing parts attach to this frame relatively simply.

More vents on the underside of the wing.  I've since painted this in Gunmetal.  The only way you can paint this is before you assemble it, so save yourself the time and just do it before you put it together (If you're inclined to do so.).

Thruster exhaust.  Couldn't let this go either.  I painted it in flat black.

And with that VF-27 assembly is finished but now the fun stuff starts.  Detailing, panel lining, top coat and probably the most time consuming part of this kit... DECALS.

Monday, August 30, 2010

HLJ VF-27 - WIP 6 - Midbody

Back to work and it's time to get you folks caught up. I've nearly finished this but my blog doesn't represent that. Just too much good Gundam stuff to talk about recently! Moving on!

Here are the parts in question.
From VF-27
Little details on the intake vent.  If you use the supplied stickers these will be covered up.
From VF-27
More details on the front side of the intake vent.  I ended up painting this in Gunmetal.
From VF-27
All assembled it looks like this.
From VF-27
And here's how much it can move.  Pretty crazy eh?
From VF-27
Once you add these little pieces to it you can connect the legs.
From VF-27
Bird man!  I know some people have mixed feelings about this but I've always liked the Gerwalk mode for the Macross fighters.  That was one of the coolest options to me.  The tripod legs provides a significant amount of stability.
From VF-27

Friday, August 20, 2010

HLJ VF-27 - WIP 5 - Panel lines / Gundam marker

As this WIP will double as a tutorial of sorts I'm including some processes that I wouldn't normal show. Here I'm just going to show the most basic lining technique. For this I'm using a Gundam marker "fude" type which means basically that it's a 'brush' type of pen. The brush head is very small, easy to cover wide areas but hard to get individual lines.

Little details like this are scattered across the surface of the VF-27.  There are a LOT of them.  I can afford to use some different lining techniques on this.  You can see just above this part a small sharp metal tool.  This is an awl that I picked up and use for deepening panel lines.  I sharpen the awl before use on a small diamond dust cutting block that I picked at the same shop (Tokyu Hands).  It sounds expensive but it isn't.  500 yen or so.  I use it for my knives as well.
This is the marker I'm going to use.  It's not my favourite but it's what I had laying around.  I've since picked up a 'pen' type marker which is more my style.
Before and after shots.  I just tried to get black ink into all the crevasses.  I wasn't too concerned with neatness.  You can later wipe the excess off with a cotton swab, cloth or tissue. Thinner isn't really necessary right now for a small section like this. I just use my fingers and my natural skin oil. 
Feel the plastic. 
Love the plastic. 
Be the plastic.
Here's the difference.  The lines are really thin and subtle but I think most of us can agree that it looks better with the lines.  I personally prefer darker and deeper lines that are really easy to see but others prefer a more subtle look and use brown and gray ink for their lines (depending on the base colour as well).  This is a section of the plane that won't really be seen but I just wanted to show one way to do panel lines and bring out some of the detail of the kit.

Thursday, August 19, 2010

HLJ VF-27 - WIP 4 - Legs/Feet

Back to work! Was busy doing contest stuff but that's all done with now so back to the project at hand. I'm actually much further ahead on this project than this stage but I'm updating you all when time permits.

Was really looking forward to making this part in particular because it's quite a different design than the regular VF-25.  I would love to paint this in some type of metallic colour when time permits.  Considerably more parts the the standard VF-25 foot.
Lots of movement and more stable than the VF-25 foot.
Lot's of mechanical details to bring out if you're inclined to do so.
Hip joint.  Very large range of motion here but later gets constrained considerably when the armour is applied.
Would love to paint this!  It would never been seen though!
I knew this would happen but I did it intentionally to show why sanding can be troublesome with Macross kits.  If you sand too much the surface area won't line up with the adjacent piece.  It's a minor thing but... if you're reading this you're probably a perfectionist similar to myself so it's probably relevant to you :)
Another thing to be careful of with Macross kits is pegs that look like nubs.  Do NOT cut these.  They are important for the transformation system and to keep the different forms locked into place.
Reasonable amount of parts.
Love these legs.  Beautiful lines.
Locking mechanism to extend the ankles out for the different transformation modes.  Small but very important.  That's basically the underlying principle of this kit.  Everything matters.  Well almost everything (outside of the horns on the head).

Wednesday, August 4, 2010

HLJ VF-27 - WIP 3 - Arms

I seem to have been out in the city a lot recently (drinking, eating, dancing and... cosplay festivals?!) It's been cutting  into my modeling and blogging time!  I prefer to work at night and leave the day open for other things if I can but recently my nights have been... active.  Sorry about that!  Just a short post today being done for the sake of completion.  Here are the arms.
Similar contruction to MG frames here.  More moving parts though as you'd expect.
Not much to say here but please be mindful of which parts go on the left and which go on the right.  They look almost identical but they aren't.

Thursday, July 29, 2010

HLJ VF-27 - WIP 2 - Main fuselage / Head

Brought to you courtesy of HLJ.

Here are the parts that will be added to core fuselage.

The cockpit and pilots have a lot of little details that would look lovely with a bit of paint.
One thing that you should try to take note of is how well the parts line up after snapping them together.  They should be relatively seamless, as shown here.
Some parts don't move.  After snapping the nose cone together you could easily glue/putty/sand this part to remove the seam lines and it wouldn't effect the mech at all.  Of course you would have to paint it and if you paint one part you're going to be painting many just for the sake of consistency.

You're given the option of two types of canopy.  Solid and clear.  The solid one is used in the anime.  Below are the comparisons.  The molding is exactly the same. Material is different.

Which one do you think looks better?

Parts of the head. Relatively simple.

Assembled.
Oops!  Likes like my knife slipped! haha no I did this intentionally of course.  This is the only mod I'm going to be doing to the kit.  I didn't think that the 'horns' were necessary for a super aerodynamic fighter (extra drag) so I cut them off.  I also want the head to resemble my VF-25G a bit more so I cut them off.  I'm going to do a bit of shaping later but I decided to just do a basic 'chop' right away to get a feel for how it'd look.  I kept the horns just in case I change my mind.