Showing posts with label mg. Show all posts

Tuesday, February 4, 2014

Unto Death - 1

MG XXXG-01D2 Gundam Deathscythe Hell (OVA - Endless Waltz version)

I saw a picture a while ago and decided that I needed the MG Deathscythe Hell. I was never a huge fan of the suit itself but I always thought that it was cool. I mean it has a giant beam scythe. What other suit has that? It's hard to beat and also very iconic in its own right.

According to MAHQ the Deathscythe's only fixed armament and only ranged weapon is the weak anti infantry head vulcans. I don't think they serve much of a purpose outside of that. I have seen them used to shoot down rockets and for harassment but they don't do much damage (edit - the kind Plamo Addicts at my fb page have let me know otherwise.  They're for shooting out camera's too.  Thanks guys!). So it's not a long range suit at all. Close quarters melee combat. It doesn't even have beam sabres. The scythe or nothing basically. It's got some sharp forearm mounted shields and spikes everywhere but that's it really. So this suit is meant to cover ground quickly and cut the enemy down within spitting distance.

Impractical. Vain. Cosmetic. And I love it. So what was it that made me fall in love with the suit? This.

Please let me know the artist if you know.  I'd like to give credit where it's due.
 

I know it's a kit bash of the Wing and Deathscythe together but it's the darkness of the piece that attracted me to it. It's the scythe. Everything is great. The colouring, the combinations, the paint job, the gradients, the subtlety and the totally awesome custom stand but it's the scythe that brings it all together and gives this piece some real attitude, character and charisma. There were others as well.

My vision of the Deathscythe is something like this.

 
There is a high chance that I will paint this kit later. I want to pair it up with the MG Wing Zero Custom in a Life and Death motif but stages... This needs to be built first so let's get on with it.

Some crazy box art!


My phone camera doesn't seem to like this light source.  I'll have to see what I can do about that.

My impression so far is that the kit is pretty complicated and maybe isn't for beginners. It's a relatively new kit and design but I felt like it was about 20 years old sometimes while I was making it. Some pieces look the same but there are small variations between the left and right versions. Many small pieces come together to form larger more articulated sections and these have to be assembled with great care and attention to detail. A lot of newer kits are built with symmetry in mind and it's somewhat more forgiving. If two pieces look the same they probably are and can be used interchangeably. Not so with this kit. Proceed with caution. Take your time and pay attention.

So far I'm feeling rewarded. I plan on building the inner frame first to get an idea of the range of motion and articulation. And I just really want to play with it lol

Friday, May 10, 2013

MG Wing Zero Custom - 2 - Concept


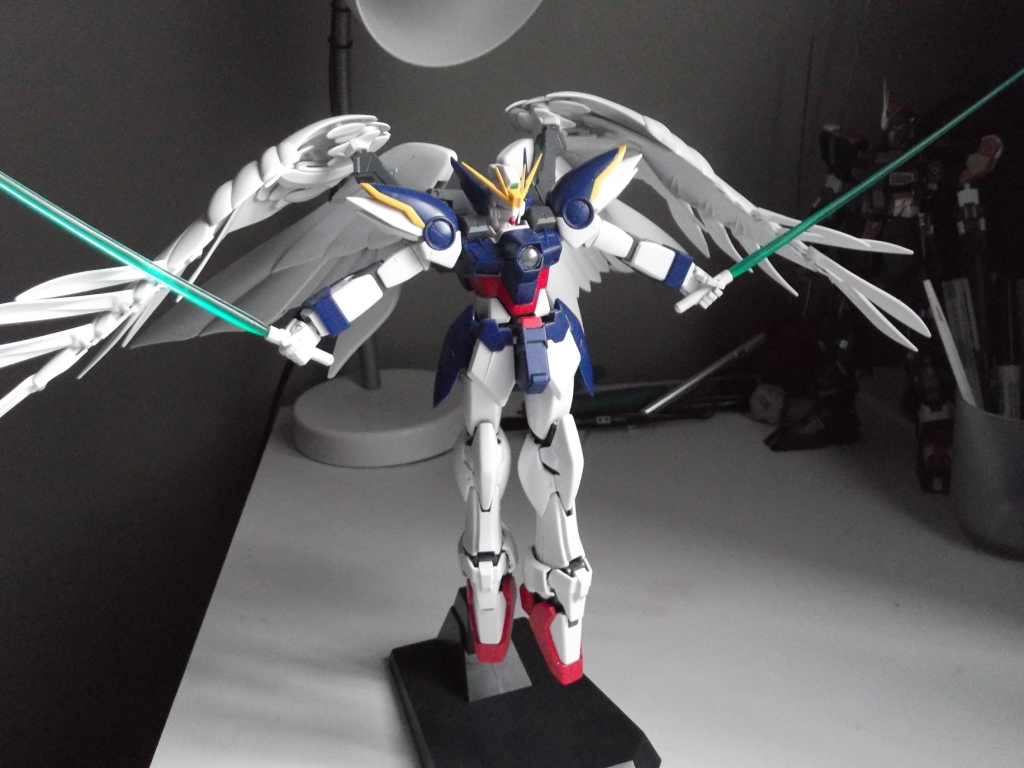
I was thinking of what I wanted to do with the Wing Gundam but then I realized that it isn't really for me.  It’s a model that I’m building for another person. In fact I didn't even build this one.  It is my friend’s first Gundam.  She’s never made one before but she’s seen me do it many times and has helped me on more than one occasion.  

Looking back I realize how much she has helped me with this hobby.  Around the first time I met her was when I’d first gotten the PGSF and had just sprayed the frame gold.  She was really interested in that.  Since then she has brought me many Gundams. Two HG Jestas, HG Zee Zulu, two Phantasy Star models (one for my sister), MG Shenlong, MG Nu Gundam, HG Strike Freedom (her choice), MG Wing Zero (her choice) plus two more models that I haven’t mentioned yet (upcoming projects for 2013).

She brought me extra parts and helped me to get new hands for the MG Nu Gundam that I thought that I’d lost.  But it turns out that I actually didn't so I have an extra pair of emotion hands. I customized the HG Strike Freedom based on her colour choices and this Wing will be no exception.

She built this one herself and I helped her with some minor things.  Really glaring nub marks and making sure the moving parts were set up right.  Some things with the mask that can be tricky (if you even care about them). But not really that much.

Before I could continue with the work on this suit I wanted to get her input on the colours to use.  I'm really painting it for her so I guess it’s kind of like a commission.  What I want doesn't really matter. So there was a bit of back and forth about what colours to use.  What the options were, how things could be changed etc.  What should go were…  A lot of negotiating but in the end we've come to an agreement.  I wonder if doing real commissions is anything like this? 

Maybe you can detect some similarities between the design of the Wing and Strike Freedom.  The question I asked her was; “Imagine you are the pilot of any Gundam.  Which one would you choose?|  And without even realizing it she chose the first Gundam that she’d ever seen.  The gold PGSF frame that she saw when we’d first met.  She’d just picked the smaller version of it.  This Wing Gundam is the one that she really fell in love with but when she went back to pick it up it was sold out.  So she got the HGSF instead.  When she had the chance to get this Wing again she didn't hesitate.

Her favourite colour is purple so it is a colour that she always wants in there.  But because it’s spring and the Wing is kind of a light and airy mech she wanted something lighter and not something that uses dark tones so we've settled on a kind of pastel type of scheme that doesn't deviate much from the regular design.

The next stage is to separate the parts into sections for sanding and painting.  I’m going to try and stream line the painting process this time as I noticed that I have a lot of inefficiencies from when I was building the Nu Gundam.  I’m going to try and do this one more “by the book”.
Which means priming and sanding, hopefully I've be able to get a good layer of paint down and will have a good finish.  That’s what I’m going for this time.  I’m going to try and not do anything too overly complicated.  I don’t want to get caught up in my own mind and be stuck in the procrastination zone.  As always my biggest obstacle is myself.

I aim to finish this before the first day of summer.  Spring project.  Hopefully this project will go a little bit faster because I’ll be using her as my assistant whenever I can.

I probably would never have bought this for myself.  But it sure is awesome...


Good movie!


Still don't know what to do with this...


Ah well.  Time to get to work.

Wednesday, April 24, 2013

MG Wing Zero Custom - 1

Well it's been over 3 weeks since the Gauntlet finished and I think I'm ready to go back to Gundaming again. The MG Nu kind of burnt me out a bit because of all the failures and troubles I had with it... After I finished the Gauntlet I was thinking of going back to it and finishing it the way that I wanted to but I have nearly 100 models that need attention too... I'll be coming back to the Nu later on but for now I want to try something a bit simpler.

Enter the MG Wing Zero Custom.

Actually I didn't build this one. My friend built it by herself and it is her first Gundam. She wanted to get it a while ago but ended up getting the HG Strike Freedom instead when she found out that it was sold out. That one I made and painted for her. This one she made herself and I helped fix up a bit. Some work on the nubs, sanding and getting the moving parts to fit right. Work on the head. Nothing too crazy. She did most of the work... But now that the model is done and has been sitting around for a while I think it's time to kick it up a notch.

I've had a lot of time to mull over what I'm going to do with this thing but for now take a look at the test shots.


Gotta clean up the desk before I start a new project.


He waits.  His time will come.

Wednesday, April 10, 2013

Gauntleteers 2013

Musketeers?  Noooooooo.  Privatateers? Noooooooo.  Volunteers?  Well kinda yeah but we're really the Gauntleteers, those of us that survived the trials!  Of the nearly 20 people that entered only 7 survived to the end.

Here are the survivors.

First, the Captain and leader of this charge.  Lupes.

He started his kit right away and by the time the Gauntlet had officially started he was well ahead of the rest of us.  He put in a lot of work and he finished way ahead of schedule.  He was already deep into his next mission when I barely squeezed in 2 minutes before the deadline and even that was an effort.  Lupes has a pretty disciplined build approach and isn't afraid to put the time or money into a project to make it right.  He often repaints, tweaking things that don't seem quite right.  I've worked with him on every Gauntlet so far (Sinaju ver.ka, PG Strike Freedom, Nu Gundam ver.ka) and he puts out quality work every time and has been getting better over time.  and bolder.  Which is a good progression. Just never know what that guy is going to do next.  Very unpredictable and consistently puts out good stuff.


Next is Syd, who has also participated in all Gauntlets and some other group builds that I sat out (MG Unicorn and ReZel I think).  Syd can occasionally do some pretty radical things to his Gundams but for me one of his trade marks is his ridiculous decal work.  A very solid effort and you can tell that he spent a lot of time to make his work solid and consistent with a lot of attention paid to small details.  I personally really like the black and silver theme.  It's very classy and really helps to draw attention the trademark red ver.ka decals.


Next we have a veteran of the GAF forums, Falldog who has never failed to impress me with his work.  With his Nu he went for a more muted theme using flat blues and greys which I think looks excellent.  I love the contrast and he used the right colours in the right areas.  I also like how he used the Sazabi cockpit in some of his pics.  Very cool stuff and very clean, solid work.  I liked his lining work... but what will did it for me was the flat finish.  It works superbly with the colours he chose.


Wolfman X decided to go with a darker scheme that most people would think is Titan's style but I think he was going more for a Delta Plus inspired scheme with blacks, greys and silvers as opposed to the black and navy Titans scheme.  I really liked the finish he got on his paint job and his decal work.  I think it all really worked here and is a good example of how versatile this kit can be when it comes to colour options.


Shaid did a version of the Nu that was very close to my heart personally for a few reasons.  1) He used the Zeta Plus A1 scheme.  2) He somehow attached ReZel wings to the back of it WITH funnels.  3)That metallic paint job!  Oh man.  When I saw his frame I was shocked.  Chromed out and if there's one thing I love it's a chromed out Gundam!  Damn dude.  Frame's so good that he had to leave some of the armour off.  Which is fine I did the same too.  But just fyi I wasn't copying him.  I thought of doing that on my own before I saw his suit.  One very fine piece of work and a fantastic finish all around.  Great outdoor photos.


Khai's work is very unique.  When I saw his initial WIP I was pretty stunned.  Custom weapons right across the board.  Special beam rifle, special rail gun arm, special shield, shoulder mounted bazooka plus all the funnels... his mech is probably the FA unit of lot.  Khai's paint scheme is closer to the Titans look than Wolfman X's is.  He used the navy, black, red and yellow in Titan's areas and proportions and I think we can all agree that almost any suit looks good in Titan's colours, this one being no exception.  My fondness for that scheme goes back to my first days with Gundam because my first MG was a Mark 2 ver.1 Titan's and I loved it because it was the only black Gundam I'd ever seen.  Even now it is known as "The Black Gundam" because of the title of the first Zeta Gundam episode where it made it's debut.  Which I always felt was a bit of misnomer because it's actually a lot more navy then black... but I guess "The Navy Gundam" just doesn't have the same gravitas.


And last is me...  But there will be plenty of time to talk about what I did.  I largely decided on going for something that could bookend my Sinanju so... I went dark as well.


Looking at these guys I know that my work doesn't compare to theirs but I learned a lot and was inspired by them in many ways and for me that's what a group build is really about.  While I did finish the Gauntlet this still more work that I want to do on this kit but I don't think I'm doing it justice like this.  I will finish it properly... up to my own standards... and in my own time.  Which as a lot of you know can be a while... hehe

Thanks to everyone who participated, GAF for hosting for all the readers who followed our journey!

For me it was:
2009 - Sinanju
2011 - Strike Freedom
2013 - Nu Gundam
2015 - ?????

Until then!


Saturday, March 23, 2013

Nu Gundam ver.ka - 5 - Section 1 Complete

The build process has been evolving as I go. I get new ideas on the fly and take inspiration from my fellow modelers and those who have built this kit before me. I'm being very fluid and am living in the moment when it comes to this. This build may be my best one to date. There is an overall plan and theme... but I'm being very flexible in how I reach that goal. This will be the last week so it's time to kick it up a notch and try to blast this out.

I am very excited about this Gundam.

I feel like I've done some good work so far and that I've become a better modeler, blogger and artist through the process of making this "Bloody Machine". Some of you may already know what I mean by that but if you missed it... my blood is on the ankle, hip and shoulder ball joints. Unintentional accident because intentional design mechanic.

 But enough digressions, we move ever onward!


This is as close as he'll get to being OOB.  Remember this shot for posterity.  He'll never be the same again.
Time to get serious!
Strategic speaker placement so I can groove while I work!

Broken down into the main parts.  I'm attacking this build with a modified technique.  Component focus.