Monday, November 30, 2009

1/144 1 Gundam


HG 1/144 conversion. What do you think? I didn't like it as much as I thought I would. Just seems a bit plain in comparison to Reborns Gundam. I actually like the 4 detachable funnels at the back on the 'combined' version. I think it gives it a larger sense of weight and power.
Odd to find that once I see it in real life I don't like it as much as the lineart.

Sunday, November 29, 2009

Scratch built GN-X hands


I really don't know what to say... The level of precision... my goodness. Love the face too! Potential mod for the people thinking of getting the MG maybe?

Sorry I can't remember the source. Will edit this post should I come across it again.

Friday, November 27, 2009

GNY-004B Black Plutone

For those long time readers of my blog you might remember that I talked about this suit quite a lot when I first started. I had only been blogging for a month when I first mentioned it.
Actually, even now it's still one of the one popular things on my Flickr.

Here's a pic from those days.

s 028


Well the Plutone is making a comeback it seems and it's back in black.

From last months Dengeki Hobby.

I have no idea what the story is behind this thing but I think it looks cool. Kind of reminds me of Psycho Gundam in a way. But better.

The Plutone, if I recall correctly, is supposed to be the predessor to Virtue/Nadleeh Gundam. The cables in the back are a unique touch and I definitely love the colour scheme.

Personally, I'm not the biggest fan of the cables and I don't know what those things on the shoulders and hips are but all around... I have to say that I like it!

So what do you think? Feeling it? Not feeling it?

Wednesday, November 25, 2009

Era with the Best Zeon MS designs!

Back in early April this year, I asked whether most of you were Feds or Zekes. It turns out that most of you are Zekes.

Then, starting way back in early June I asked this question and I've been whittling away slowly and patiently trying to get to this final era.

Finally, after hundreds and hundreds of votes it's been decided.

Char's Counter Attack - 34 (27%)
Unicorn - 91 (72%)


U.C. 0096 is the BEST era for Zeon MS designs
*according to the readers of this blog.

Can't say I'm surprised. When I polled to about what the best Gundam series was, 00 won by a significant number. It's the popular things! So because of that... I'm pretty sure I can predict what the answer is going to be for the next poll. That said... I have been surprised before while doing this! I could happen again. But that's not likely :)

Customary pics of the winners!


4022881412_0b2f965777_o


Damn this pose is sick! I'm totally stealing it.

Tuesday, November 24, 2009

Unicorn Display Base

Remember how I said that I might not even open the box? Well, that didn't happen.


Unicorn Mode actually has eyes! My first time to see it so clearly. Similar to the Sinaju it's really hard to see the eye/s of this MS in Unicorn Mode. I wonder why they made both of the main mobile suits like that?

The transformation sequence of this base is not that difficult to do and both heads look equally nice to me, however the Destroy Mode version edges it out a bit because the Unicorn Mode's 'horn' isn't a solid one piece unit and looks a bit unsightly to me at times. I can now really appreciate the design of this MS. It really is a piece of art. As I don't have the MG version to compare it to I can't say what's different and what's the same but I now have a new level of respect for the design.

Not sure what 1/144 suit I can put on this thing but I like having the 1/48 Unicorn head by itself. Not sure when or if I'm going to paint it but I probably will someday. I'd say it's worth the money! The magazine it comes with isn't bad either! Now that my Hobby Japan subscribtion has run out (it's been a year already!) I'm free to buy more Dengeki Hobby's which in my opinion is a superior magazing for people who like Gunpura primarily and not stuff like... Queen's Blade. Not that there's anything wrong with Queen's Blade but I'm just saying... I'm buying the magazine for Gundam, not for... uh... well... yeah.

I like how Dengeki Hobby now starts with the months important hobby news. It's a nice little difference between it and Hobby Japan. One amongst many. The calibre of modeling is better too imo. Can't believe I'm saying this... but I'm glad to be free of my subscribtion to Hobby Japan. Good magazine but Dengeki is just plain better.

Monday, November 23, 2009

Gundam supply shopping again


I don't even really like the Unicorn display base that much but... what the hell. Why not. Not sure if I'm even going to open it.

Enamel thinner and flat top coat because I'm starting to run low on both. Gonna be top coating my Sinanju more now that I've finished the touch ups. Hopefully it'll help with the wear and tear on the paint job that I've seen in just a couple of months.

Saturday, November 21, 2009

MG GN-X?!

Who's looking forward to this? I'm not sure I am as I already have the HG version. I have to say I'm pretty surprised (and pleased) by the decision to make this though! The mods are going to be great!

Stolen from here.

Friday, November 20, 2009

Wednesday, November 18, 2009

More shopping

Wanted to show a pic of some stuff that I bought in mid October because it's finally going to be coming into use soon. I was just walking around Tokyu Hands and saw a couple of cheap things that I thought I might be able to use in the future so...


2 Red LED's + battery box. Didn't work as well as I hoped. Couldn't get a very strong light for some reason. Who knows why.
Couple of small magnets. These things can't be cut though... so if I'm going to use them I have to use them as is.
Sanding head for my mini design router. Shaft was too wide so I couldn't even use it. Note to self: It's not a standard system. Measure beforehand.
Mirrored decorative tape. The cheapest thing here. Probably the most useful tool.

Tuesday, November 17, 2009

Entering the Airbrush Era - Beginnings

Back to my original story...

The first day I got my airbrush the first thing I did was read the instruction manual. As I've mentioned before, I get some of my best ideas on my throne so I took the manual with me and read it over thoroughly.

Luckily the manual was written in many languages, one of them being English and it came with a lot of diagrams and illustrations.

After I got an idea of how the process works and learned about the parts of the airbrush and learned how to set it up AND learned what to watch out for, I gave it a shot.

First was the paint. I have a lot of paint. I recieved a very large paint set almost 10 years ago from my ex-gf but never really used it the way I should have. She bought me this VF-1A 30th Anniversary Valkyrie to go with it.


She was with me in a Japanese souvenir shop back home and we were looking at the models and she really liked the SD-Gundam Zeta series set so I bought it for her. She kept the Hyaku Shiki and the Zeta but the gave the Mark 2 Titans to me because she knew how much I liked that suit and she thought it'd look cute next to my MG Mark 2 Titans. Sweet girl. Later on that year she got me the paint set.

Anyways... another gf after her gave me even more paint (because I left the first batch back in Canada and I met this gf in Japan and had no paint with me) which was very nice of her. I used that paint on the 1/100 Red Frame, of the OYW White Demon. After I went back to Canada I brought all the paint back with me along with a couple of models. I don't know why I did that. I just didn't want to leave them at home for some reason. I felt that I could finally do them justice now that I've increased my skill set.

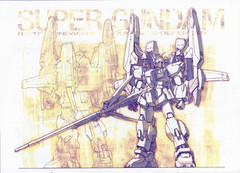
I only brought back two out of purely sentimental reasons. The first was the 30th Anniversary Valkyrie that I mentioned before. The second was the first model I ever bought. The Sentinel (nickname for my no-grade S Gundam.)

It was in a semi-sad state of disrepair and I thought that I would finally be able to 'resurrect' it.


Sad to say that day has yet to come and I'm not sure when it will. So much to build... so little time!
I'd always hoped to be able to finish these machines properly once I got enough skills... AND the right equipment. I think I'm there now. I believe that I can do it but there are other things that are taking priority now.
So now I have a LOT of enamel paint from back home and these two old school models that I'm probably not going to work on for some time. First things first. Use up the paint.
I tested out the airbrush initially with just some regular black that I had laying around. The paint had long since settled at the bottom of the jar but I stirred it up a bit with a toothpick, poured a VERY small amount into the airbrush paint canister and mixed in a little enamel thinner until I got it too a very runny consistency (comparable to skim milk).
I tried it out first on a cut up milk carton and played around with the brush a bit, trying to figure out what everything did and how I could use it. Also took note of distances from brush to surface and what kind of painting effects I could get when I varied pressure and distance.
After all of that I tried it out on my first piece, that being the sinanju bazooka.
Since then I haven't used it as much as I thought I would but I'm glad I have it regardless. I still do a fair amount of hand painting but for the recolours I often do, this device is sure to come in handy.
I'm learning as I go obviously but that is the reason why I created this blog after all!

Monday, November 16, 2009

OK... I'm starting to scare myself now...

With the new eye this thing is starting to look alive. It's always looking. Always awake. The eye is always shining. That single, solitary eye. Always watching!

I fear for the place I'll end up at once this is done. I almost like the nondescript mask more. I mean both are equally emotionless but this single shining eye can be a bit off putting. It looks more fearsome now that the eye can be seen as opposed to the shaded face.

More to come obviously as I'm just really in the testing stage now.

Changing the face is a big deal for me. I feel like it really contains the soul and personality of the machine (oxymoron yeah but you know what I mean). Changed some of the lines, opened up the visor, changed some of the colours. Some of the most precise work I've done to date has been modding this eye and helmet.

Details to follow.

Friday, November 13, 2009

NZ-666 Kshatriya


Ever seen one like this? Seriously. These Japanese guys really go to town on their stuff sometimes!

More here.

Wednesday, November 11, 2009

Sinanju Rocket Bazooka - Hands

Continuing my work on my Sinanju upgrades; now that I've basically finished the bazooka I have to figure out a way to get this monster to hold the damn thing.

Anyone who's built the Sinanju knows that it has trouble holding the rifle and it also has the same problems holding the bazooka. Not to mention the shoulder armour and the wings getting in the way. In order to give it a bit more stability, I glued the hand to the rifle.

Now I'm using some extra 2-piece hands (from MG Impulse, coincidentally almost the same size) to hold the bazooka for those poses without the rifle.

After trying it out I realized that they didn't fit together so... time to remove some plastic. Check the green circles to see where. Basically the pegs on both had to be removed along with a bit of the palm.


These two piece hands are way better for holding weapons then the ones that come with the kit, especially after the finger mod I did.

At least now I don't have to worry about the weapon falling out! Poses like this become a bit easier to do but it's still somewhat awkward, especially when trying to pose it with both hands on the bazooka. The Sinanju wasn't made with this weapon in mind but even still... I'd have to say that it certainly doesn't look BAD.

October's Gundam Pictures - Round 2


4048401502_3fcb0556a2_o
Originally uploaded by Busterbeam
This is the batch from my work computer. Yes I look at Gundam stuff at work. Don't tell my boss. Wait... I am the boss!
*cue evil uproarious laughter*

Tuesday, November 10, 2009

October's Gundam Pictures


4054457193_70604cf060_o
Originally uploaded by Busterbeam
Time for the flickr file dump. This is all the stuff that I collected in October.

Monday, November 9, 2009

CB-0000G/C Reborns Gundam/Cannon & CBY-001 1 Gundam

I was never a big fan of this MS but after seeing this repaint of the HG model I'm starting to change my mind.

To be honest I started to gain a lot more interest in this suit after learning about the "1 Gundam".


What do you think?

I really liked the design of this for some reason. I thought the 2 sided MS idea was kind of silly but I do like the basic MS design by itself. I'm glad they made this and if a HG model of it is made I think I'd like to pick it up.

Love the default colour scheme!
Apparently it's pronounced "AI Gundam" as in 愛 like love. wtf?!

From ガンプラの山を崩せ. Check out his site. He has done some amazing recolours. Great photography too!

Friday, November 6, 2009

This bazooka is done. - Part 2

Here's the rest of the work that I've done on the bazooka. I've decided that I have just a little bit further to go on it but that's just fixing up that nagging crack in the muzzle.

Unrelated, I wanted to use up all of my 'loose' decals (as in decals that were no longer attached to the main decal sheet) and put an extra one on the shoulder armour that I'd removed earlier. It was just laying around so... why not? Thanks to Gaijin Gunpla again for hooking me up with these.


You may remember about my recent problem with the cobwebs. Well after wiping it down with my thumb a bit, I was left with a semi-decent surface result that I was satisfied with. I was originally going to spray a clear green over it but decided against it. It's not so bad as is. It's subtle and the green would really stand out a lot. I'm not even sure what the dome thing is supposed to be anyways. Maybe like a radar/tracking type of device?


Details in silver enamel and Gundam Marker silver.


Using up the decals.


More detailing. Just because I can.


Decided to use some Aurora decals on the beam rifle. It looks SO good. Also painted the tubing/wiring in silver.


I actually spent a lot of time on the bazooka shells. I ran out of certain decals so I couldn't make them all the same but I can easily account for that in the story that I'm going to make for it. This was one of the first things I did for the bazooka. I wanted the shells to really stand out and I spent a lot of time cementing, sanding and puttying to remove the seam lines. I wanted them to have a uniform surface. By scale these shells are taller than a human being!


More decals. Just because


All assembled. I'm pretty happy with the finished result. Worthy of my machine.