Wednesday, April 29, 2009

Hobby Magazine Poster's - PG Red Frame

Well I've been spending a lot of time scanning some of the posters from my hobby magazines and figured I'd share some of them. For this session I'll start with the PG Red Frame posters.


Monday, April 27, 2009

Sinanju Bazooka 2 and PG Red Frame PG Strike frame comparison

Well first off let me apologize. They were sold out. I got the VERY last one at my local shop and since these things are apparently quite rare now, I can't bring myself to sell the extra one I have. Maybe someday. We'll see. A lot of people asked and I would say first some first serve but it just doesn't seem fair somehow. Especially considering I only have the one extra.
I'll keep my eyes open though. If I see anymore I will certainly grab some and sell the extra's but I do want to keep one for my collection. The double gattling guns for the Unicorn Gundam are all but gone now. I don't know where or how you could get one of those these days.
I was totally clueless about the demand for these things and the scarcity. My apologies again. I even went to the post office and figured out how much it would cost to send just the bazooka to any country, speed, price etc. Had it all set up then went to buy some of these things and there was only one left. wtf. 申し訳ございませんでした.m_ _m
***
Moving on the next order of business is the PG Red Frame / PG Strike frame comparison.
I didn't realize just how similar they are. I mean I know a lot of the runners say 2004 on them, indicating that it was copied from the Strike mold but still. It is ultra similar when you look at it on the frame level. Parts of the 'sub frame' (or the frame of the frame) are different, like around the torso and back pack but... yeah I didn't realize that I was buying the same model! It's like doing the 1/100 Blue Frame 2ndL and the 1/100 Red Frame again. Practically the same thing minus some of the armour parts and weapons. Blah.
It's not an entirely bad thing though. Because I wanted to see the similarities between the models I stripped the Strike down and found out that I had it assembled wrong all this time! For years! I lost a couple degrees of articulation in the torso (the part that connects to the waist pistons had been put in backwards.)
Oh well. The end result will look quite different regardless of how similar the frames are. And really that was expected. That's not new information. Even from the story we all know that the MBF Prototype suits are based off of the GAT series of MS. I kind of like the idea actually because it's consistent with the story. It also gives me some ideas for my own story about this suit I'm building now but more on that later.

Sorry again about the bazooka's guys. But like I said in the Storm Dynames post... I was just kicking around the idea.

Sunday, April 26, 2009

Sinanju Bazooka

Well I have to admit that I'm surprised at the response to the news that I was thinking of selling the bazooka to some people who are having trouble getting it. I'm not sure what price I'm going to ask but I have to consider a couple of factors... so I'll let people know as soon as I can. Here or by mail. Like I mentioned in the comments section of the previous post, if you're interested in getting one please mail me at plamoaddiction@gmail.com com and I'll see if I can do something for you.
I'll post a bit more information about this in the next couple days. I would also like to show you exactly what you'll be getting and you can decide for yourself whether it's worth the price I'm asking or not.

Friday, April 24, 2009

Gundam Storm Dynames


Top copy
Originally uploaded by Busterbeam

I was going to talk about how I picked up the Sinanju Bazooka and how I'm willing to send out some if anyone's interested.

I was going to talk about how I've deconstructed my PG Strike and am doing frame comparisons with the PG Astray.

I was going to talk about all the new **** that's coming out like the 1/100 Gold Frame, 1/144 R2 Exia and O Gundam, MG Igloo 2 Gouf Custom and how I have to really stop myself from buying more Gundams.

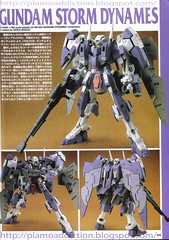
I was going to talk about all of that and more until I got home from work this evening and found my new Hobby Japan in the mail.

I saw this.

And now... EVERYTHING is on hold.

More at my flikr.

Tuesday, April 21, 2009

PG Red Frame - Dengeki Hobby 5 scans + Analysis

It wouldn't be right if I didn't finish off the set so here it is. Red Frame P-02. All the work done on the previous versions posted here were also done on this one so lets take a look at some of the modifications.

First the main shot.


The first thing most people are going to notice is the clear green on the legs and the helmet. Also great decal application on the left shoulder. Hard to get that looking good with the edge there.


Great decal job on the outer right leg. V-Fin has been sharpened. Extra detailing on the inside of the vents on the back of the shoulders.


Anyone who's assembled this kit knows that there there are two types of red parts (not including polycaps). Care was taken to unify the colour scheme (including the grey parts). There isn't as much contrast, but that also means there isn't as much distraction. I think it works. I haven't gotten into the sword assembly yet so it's hard to comment but it looks like the blade of the Tiger Pierce is a bit darker than the Gerbera Straight. I saw something like this in Hobby Japan as well but that was more of a custom job. It also looks like the hamon is different on each blade as well. Not sure if that's a custom job or if it came like that but I like it. I'll be investigating this in further detail as I near the end of the build process. I intend to spend extra time and effort on the swords (as I did with my 1/100)


Clear green on the clear parts creates a great effect. Especially with the decal and lining under it. Looks like silver paint on the helmet visors, lined then covered with a clear green painted on the clear part. It works in my opinion. Plastic removed from the torso is a minor mod but it's good. I think the deeper etching of the panel line there created a larger effect though. Lining on the inside of the armour? Hm... don't know if I'm going to go that far this time.

I'm not done with these Astray's yet friends! More to come!

Wednesday, April 15, 2009

PG Blue Frame and PG Red Frame - Work Log 1

Same deal as the Gold and Green frames that preceded it.


Update:

After I finished the Sinanju I took a couple of days off (about 3) and started on the PG Red Frame.

It has been a joy to build.

Initially, I thought that I'd just cut and assemble but I couldn't bring myself to leave the nubs on so I shaved them off of all the pieces. Even the polycaps.

Just looking at all the detail on frame... It makes me want to spend SO much time on the smallest part just to bring all that mechanical detailed goodness to light. But if I did that, 1. It would take forever 2. It would all be covered up. Not only by the armour but also by other pieces of the frame! Frames within frames... I forgot what PG's are like.

I've been doing one section a night. Trying to at least. I'm on a good pace right now. I've decided to let the details go for now and just stick with my original concept. That means I have to build the frame first (not even cutting the armour off the sprues yet) and once that's done I'm going to prime it for the re-colour job I'm planning. Even though most of it is going to be covered up by armour in the end... In this case, it's the principle of it that matters.

Monday, April 13, 2009

Winner of the Pink Nakajima Megumi Custom Messiah trade Contest and Michael's VF-25G

I thought that I posted this but I guess I didn't.
Well here is a pic of the winner. So Miss Nakajima gets this one and the modeller gets her one-of-a-kind pink one made by the Hobby Japan Pro-Shop.


Personally I like this one better and I can see why they chose it. It really is a great paint job!

On another note I'm starting to think that all this Macross Frontier stuff is starting to get a bit out of control. All the custom decals, the new kits (that are basically all the same), the upgrades, the custom stands... I mean... yeah the mecha design is great but that doesn't change the fact that the anime itself was... OK I'm not going to say it because I don't want to offend anyone but there were some parts where I thought, "...ugh... could I have that part of my life back? So I could waste it on something that wouldn't make me want to throw up?"

That said... there were some really cool mecha designs that did make those stomach churning parts bearable and to me the scenes featuring this blue Messiah were quite eye catching. Of all the VF-25's I like this one the best and I was seriously thinking about buying it but... yeah... I don't like it that much and these VF-25 kits are quite demanding to say the least. Still though... it sure is nice... and it would go well with the VF-1S that I have here already... and I've never made a Macross model before (not completed at least) ugh...

So much beautiful plamo but so little time. And space :(

Thursday, April 9, 2009

MSN-06E - Ebon Enforcer

Started around Christmas. Finished yesterday.

All major operations on this kit are now completed.

Here's the write up.

Notes:

1. Very sturdy kit. Joints are stiff and well fitting. Maintains poses well.
2. Be careful when separating the fingers. Use something VERY sharp and narrow otherwise you may screw yourself like I did. The bottom two fingers of the right hand need to be glued in place.
3. Insane amount of details on this kit. I couldn't tackle them all but hit about 80% of them.
4. TOPCOAT, TOPCOAT, TOPCOAT. If you're going to spend all that time painting, topcoat the damn thing! And do a thorough job. Multiple times. I didn't and the gold chips away constantly. Especially if you're posing it a lot. Blah.
5. Modifying the arm to incorporate the shield assembly was the best thing I did for this kit. SIGNIFICANT improvement.
6. Repaired/reinforced backpack/wing elbow joints. Katoki's design was too weak and both part broke on me!
7. If you are SEARCHING for places to put decals and the answer doesn’t come to you immediately because you've already put about... 200 on already, just stop. Let the decals go. You can use them for another project.

Comparison:

Hard to compare this to anything in a 1/100 or MG scale. It out classes anything that I've seen or built myself. It's PG quality in 1/100 scale. Considerably larger/taller than any MG or 1/100 scale MS that I’ve seen with my own eyes. I think only the RX-0 and RX-93 come close.

Concept:

Originally I was going to go for white but then I realized that the decals wouldn’t show up at all so I went the opposite way with black. I had this... dark angel image in my mind when I first saw it. I decided to stick with black and gold for everything to really accentuate the gold trimmings.

Story:

Model # MSN-06E, officially known as the “Black Sinanju” but commonly known as the “Ebon Enforcer”. Nicknamed the “Double E Anti Gundam” by Neo Zeon soldiers, it is a play (or mockery if you prefer) on the ZZ Gundam which, Newtype ace, Judau Ashta piloted to infamy.

This prototype Sinanju was made primarily for the continuation of research on “Newtype Psycommu Technology”. Militarily, it serves as a defensive escort for ships transporting people of extreme importance. It does not see much combat because of the already heighted security around such ships.

The gold plating is an experimental hybrid liquid-polymer enhancement/upgrade of the full psycho frame employed in the MSN-06S Sinanju and the RX-0 Unicorn Gundam. This plating enables the pilot to operate the suit with increased mental 'awareness' of the battlefield.

Preliminary experiments done with non-Newtype subjects resulted in various trauma ranging from mild headaches to death.

Newtype pilots fared better but often described the experience as 'overwhelming'. Extensive mental conditioning and training is required to fully utilize the system. Inside the suit the pilot can feel hostiles at extreme ranges and can neutralize them before they ever become a threat to ship being defended.

The PsyCo-RPX (Psychic Communication Receptor Polymer - Experimental) is applied in a way similar to a proton exchange/electrolyte membrane except with embedded microscopic PCR’s and without the incorporation a membrane electrode assembly. This process is time consuming and expensive making this suit entirely unfit for mass production.

Because of the random phenomena occasionally caused by psycommu systems used in especially heated battle situations, this Sinanju never sees any frontline combat.

Inspiration:

My imagination I guess.

Conclusion:

This kit is demanding and not for beginners. It pushed the limits of my skills and forced me to learn and try new techniques. It was a very rewarding experience and I learned a lot about modeling in the process but... I'm definitely ready to move on. It was almost too much for me and I felt like giving up a couple times.

I'll have to tackle this kit again, later on down the road, to fix a couple of minor problems that happened during the photo shoot but right now, it is functional and I am quite satisfied with what I’ve done with it.

Even though I tried to do things 'perfectly' I couldn’t in the end and no matter how great it looks standing in one place... once you move it around the paint is going to fade a bit in certain areas.
The adult in me says “It’s a model and you spent a lot of time working on it so just don’t touch it and admire your work.” But the kid in me says... “It’s cool and it’s a toy and toys are meant to be played with.”, and if I think about it... I’m doing this BECAUSE of the child in me... so I won’t be entering him into any modeling contests but I am definitely going to enjoy playing with him for the years to come.

OK! Zeke's win!

Damn I thought there would be more Feddies out there. I'm changing the banner to a Zeon suit.

Official numbers out of 131 people polled:

60-71 Zeon. 45%-54% respectively. It's been pretty consistent... Fed's never really took over. Not once.

Here are some pics of different stages of Zeon MS evolution (albeit slight ones concerning the Zaku's).


Wednesday, April 8, 2009

PG Gold Frame

From this month's Dengeki Hobby


Thank you for your patronage. Please come again.

Tuesday, April 7, 2009

PG Green Frame

Perfect Grade MBF-P04 Gundam Astray Green Frame. Re-colour of the red frame, naturally, from this month's Dengeki Hobby. Images courtesy of myself. They did a pretty good job on the custom rifle don't you think?


Thank you for looking at this blog. Here is some candy.

Monday, April 6, 2009

PG Red Frame - Hobby Japan 5 scans


hj0905010
Originally uploaded by Busterbeam

I'm sure many of you have seen this already but for those of you who haven't I decided to put up this months magazine spread from Hobby Japan. Images are from srw hotnews. I decided not to scan them myself because apparently a chinese company has went and done the whole magazine already. What I really want to show you are the images from this months Dengeki Hobby but I haven't been able to find it on the net yet, so I might have to do it myself for a change.

Anyways take a look. A couple of mods where done to this to make it look sharper, particularly the V-Fin. More at my flickr.

Thursday, April 2, 2009

Flickr pic dump


beachgundam
Originally uploaded by Busterbeam
Browsing through old files for my presentation tomorrow and found a couple old Gundam pics that I thought I'd upload.

Wednesday, April 1, 2009

MSN-06S Sinanju - Work Log 14 - Wing Joint Modifications, Inside Leg Armour and Weapons

Like I mentioned a while ago, these parts broke and I fixed them. Now I'm finally doing the touch up work for them. Epoxy putty to strengthen, let it sit for like... 2 MONTHS and then I sanded.


Because I'm insane and hate seeing even a touch of red (maybe because I'm a Taurus?)on this thing I painted the insides of ALL of the legs parts. Just in case.


I didn't go for the complete black because all the red you see will end up being covered up once the armour is put on.

The legs are done minus some small detail work I have left to do. Decals are done. I messed up some of them because of all the curves on the armour but I managed to fix it reasonably well with a white Gundam marker.

Some of you may remember that I let my OYW Gundam hold the Sinanju's rifle during it's construction.

It's now time to give it back so I gave it the beam sabre to hold.


Because it's a gun, I sprayed the Beam Rifle with light gun metal. It looks really good. I think I made a good call there. Decals left to do for that and the beam axes.

And now gentlemen (and lady/ladies if you do indeed exist and read this blog)... I am proud to say that my one on one battle with this Sinanju is slowly coming to a close. I can see the light at the end of the tunnel finally and it is beautiful. I am tempted to cut some corners now because it's essentially finished but I've been so damned diligent so far and have just a little bit farther to go. Anyone but myself would think it's done but I still intend to do some touch ups on the legs, shield, head and weapons. Very minor things. I suspect that the gallery will be up in the next couple of weeks.

Poor Red Astray. Bought on the first day just to sit in the corner lol. Never mind my MG Impulse, and my GNX III, and my GM Command, and my mass produced Guncannon, and the... uh... GM Powered, HG Aegis, Savior and... oh I better stop. I'm making myself sick. Did I also mention that I'm thinking of getting Healing's Garozzo?

I need help.